How to Post Images on Instagram
On this page, you’ll find step-by-step tutorials on posting images to Instagram.
This section covers how to post images using the Instagram mobile app.
This section covers how to post images from the Instagram desktop site.
On Mobile
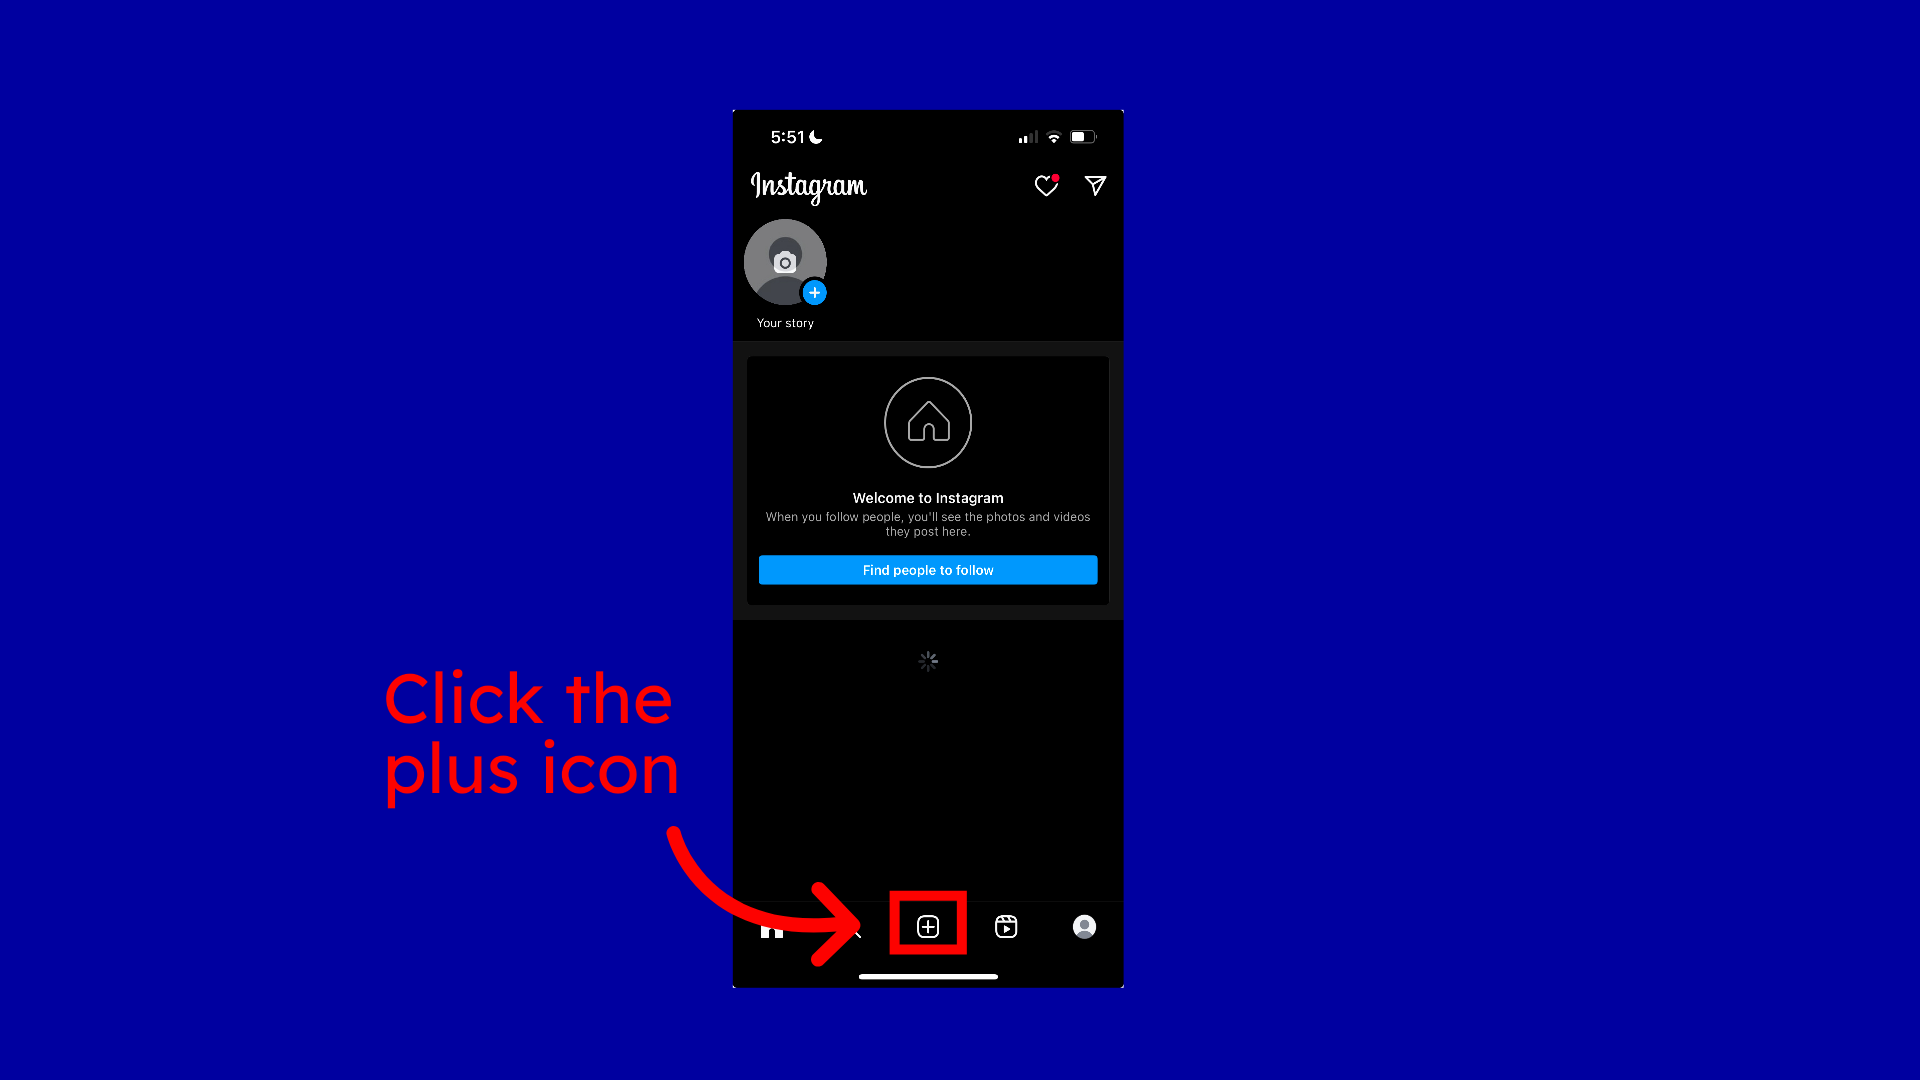
Step 1: Introduction
Open your Instagram app and click on the plus icon.
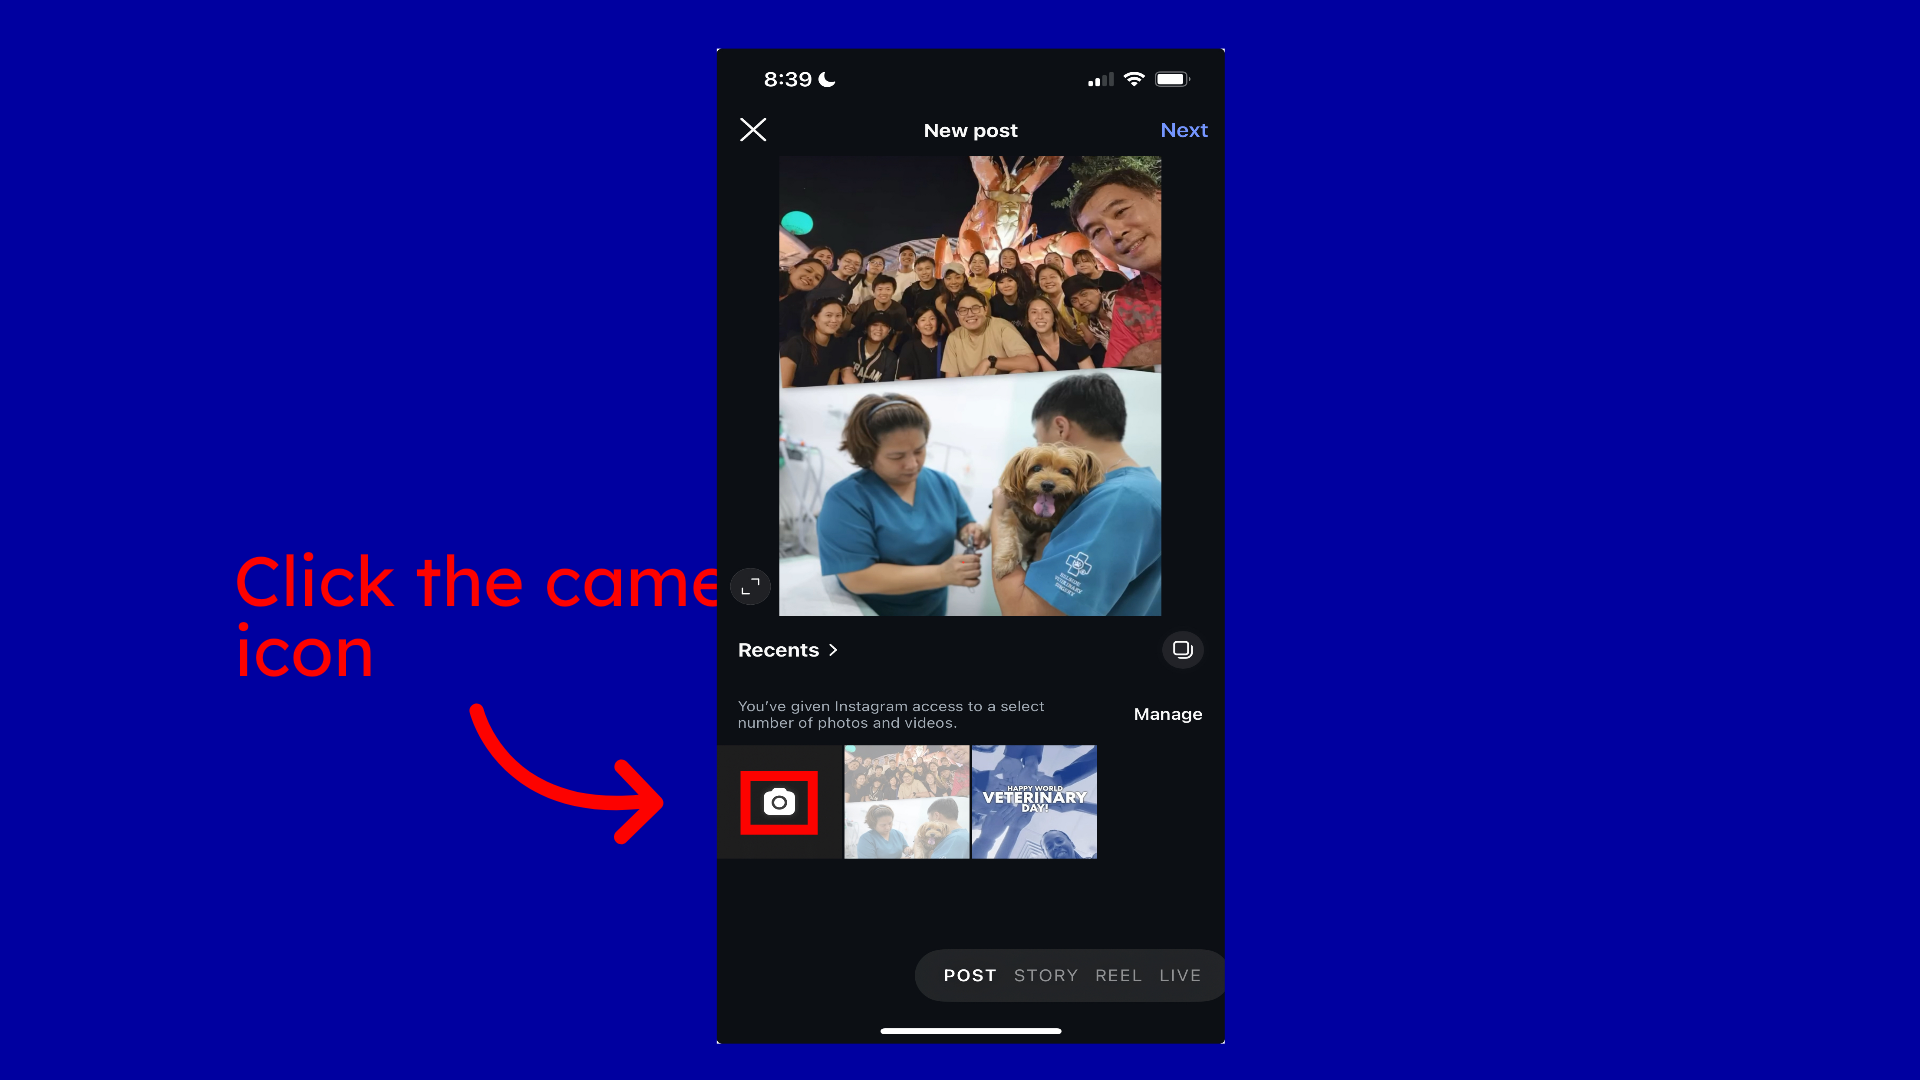
Step 2: Click the camera icon
Click on the camera icon to take a photo directly from your camera app.
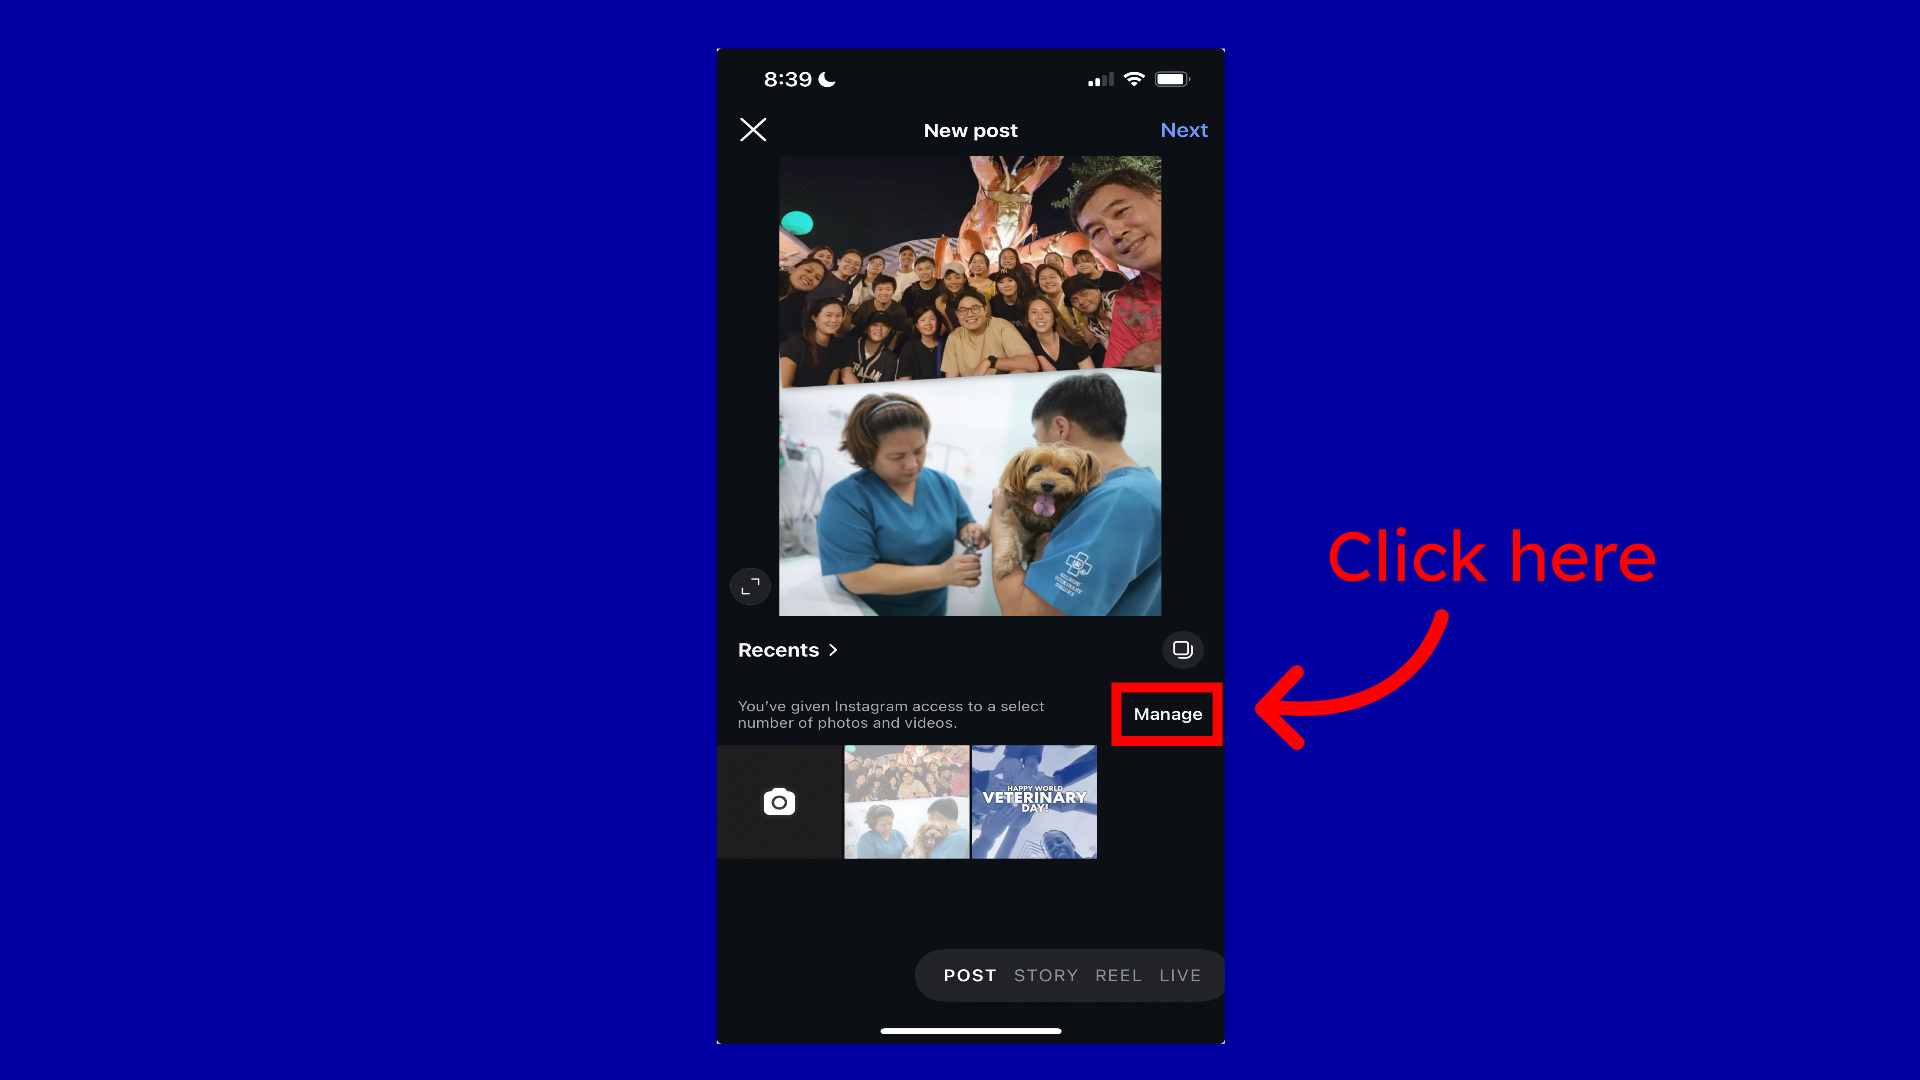
Step 3: Click “Manage”
Click manage if Instagram doesn't have access to your camera roll, and you don't want to take photos directly. This will allow you to select which photos you want the app to have access to.
Step 4: Click “Select More Photos”
Click 'Select more photos' to hand-select which images you want Instagram to have access to. This will bring you to your camera roll, where you will click on each photo individually to give access. Once you have picked all your photos, hit done in the top right-hand corner.

Step 5: Click “Change Settings”
If you want to give a blank slate of permissions to Instagram, click Change settings. This will take you to your phone's permission page for the Instagram app. Click on the photos icon.

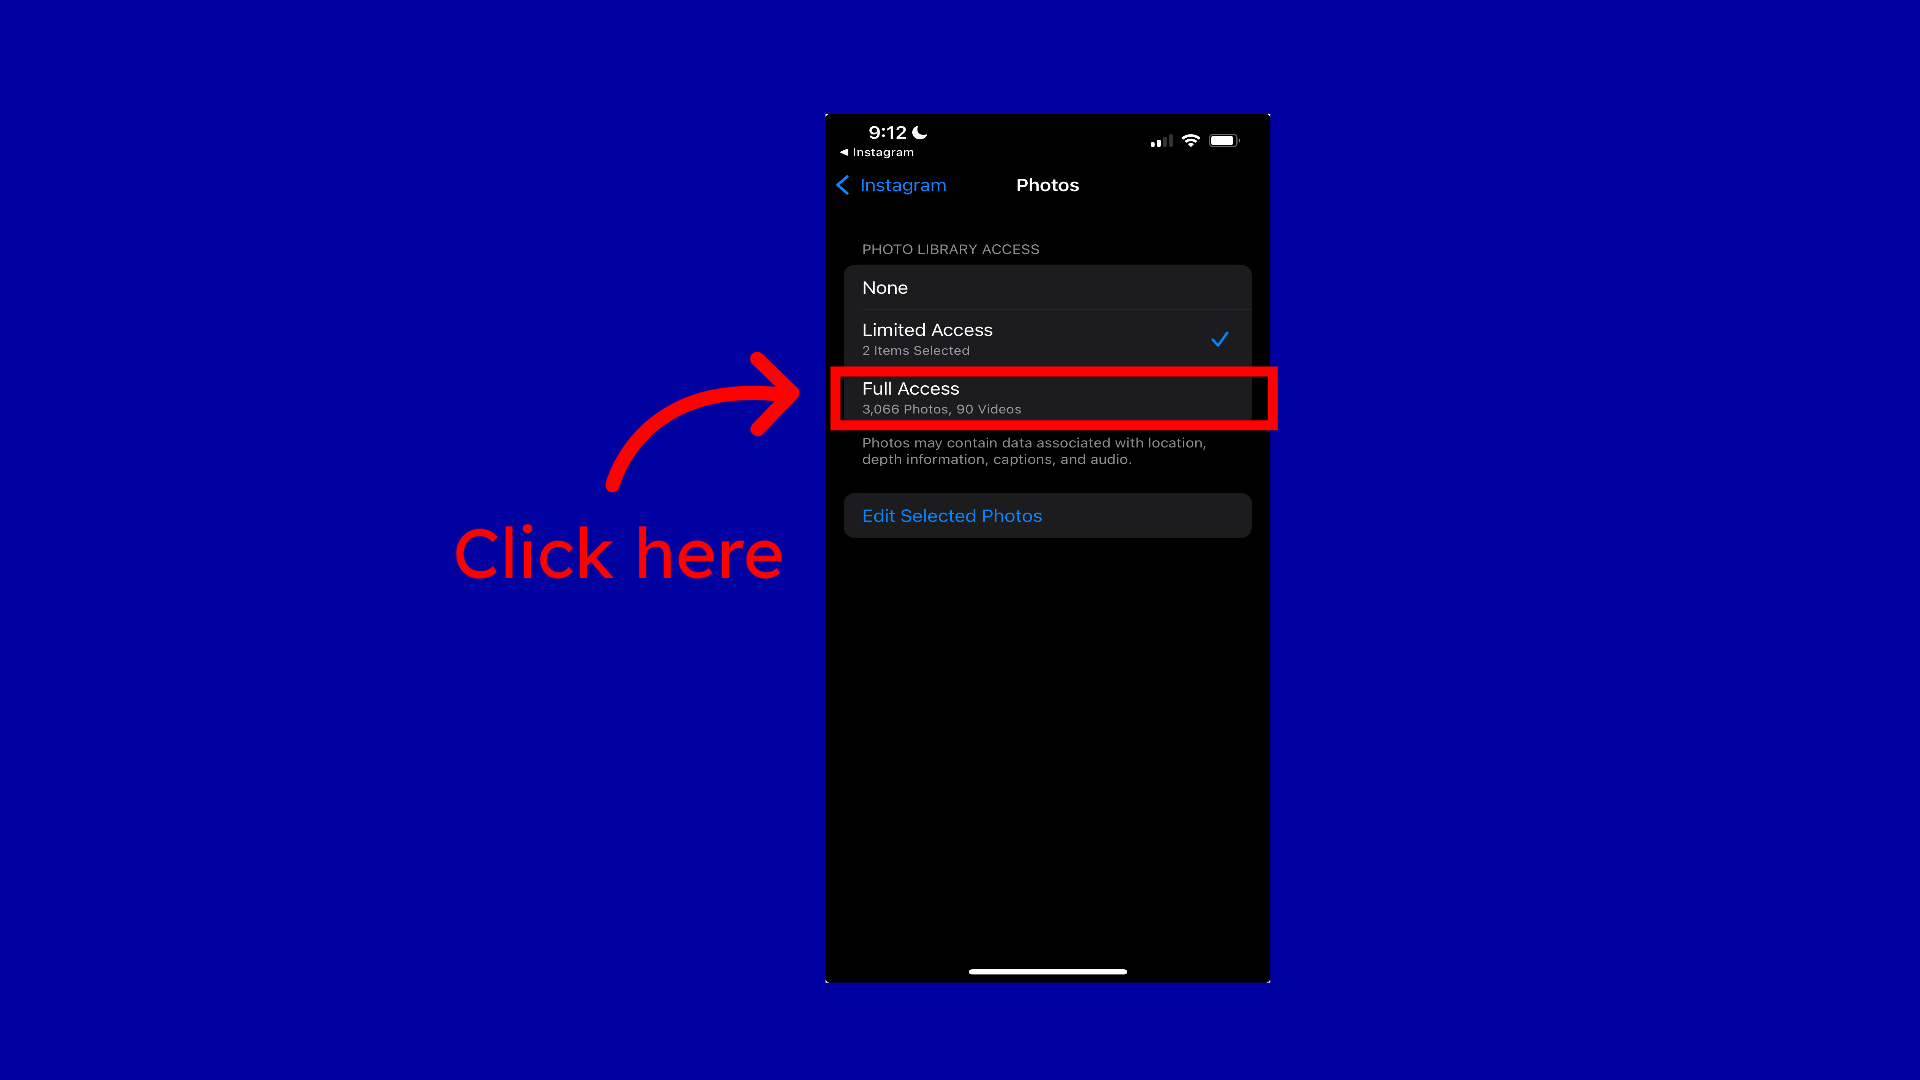
Step 6: Select “Full Access”
Select full access, which means that Instagram will update its photo library every time you take new photos and videos. Once selected, exit out and go back to the Instagram app.
Step 7: Click here for multi-image posts
Once you are back in the Instagram app, you can get started with your post. Select the photo or photos you want to share with your feed. If you want to post more than one image, click the multi-image option, then select the photos in the order you want to display them in the carousel. Then click next in the upper right-hand corner when you are ready to continue.

Step 8: Click here for multi-image posts
You will then be directed to Instagram's photo editor. Here you can add music, filters, stickers, etc. We recommend for the first few posts to leave your images as is until you get the hang of the app. Click next when you are ready.

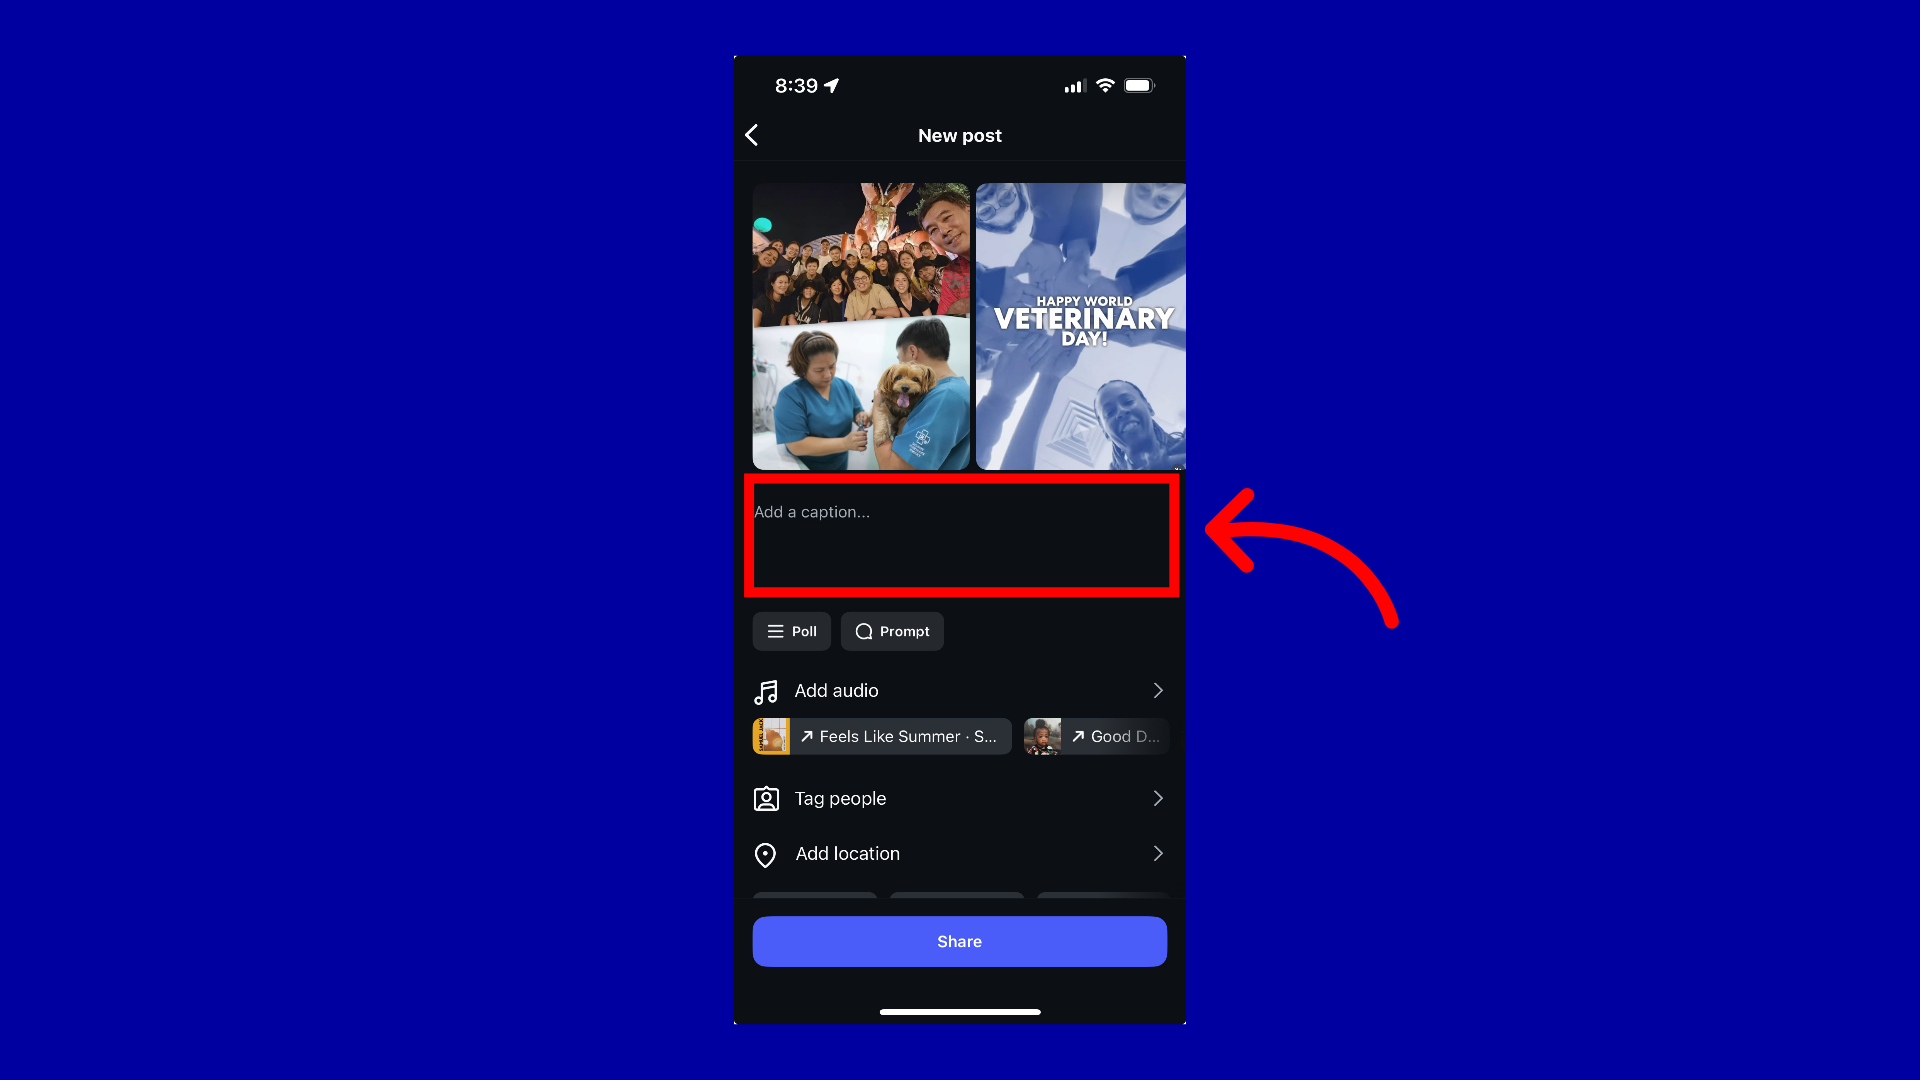
Step 9: Click “Next” to add a caption
Now you will be in a new editor window, click into Add a caption to begin drafting your copy for the post.
Step 10: Hashtags
Remember to include those MVH hashtags!

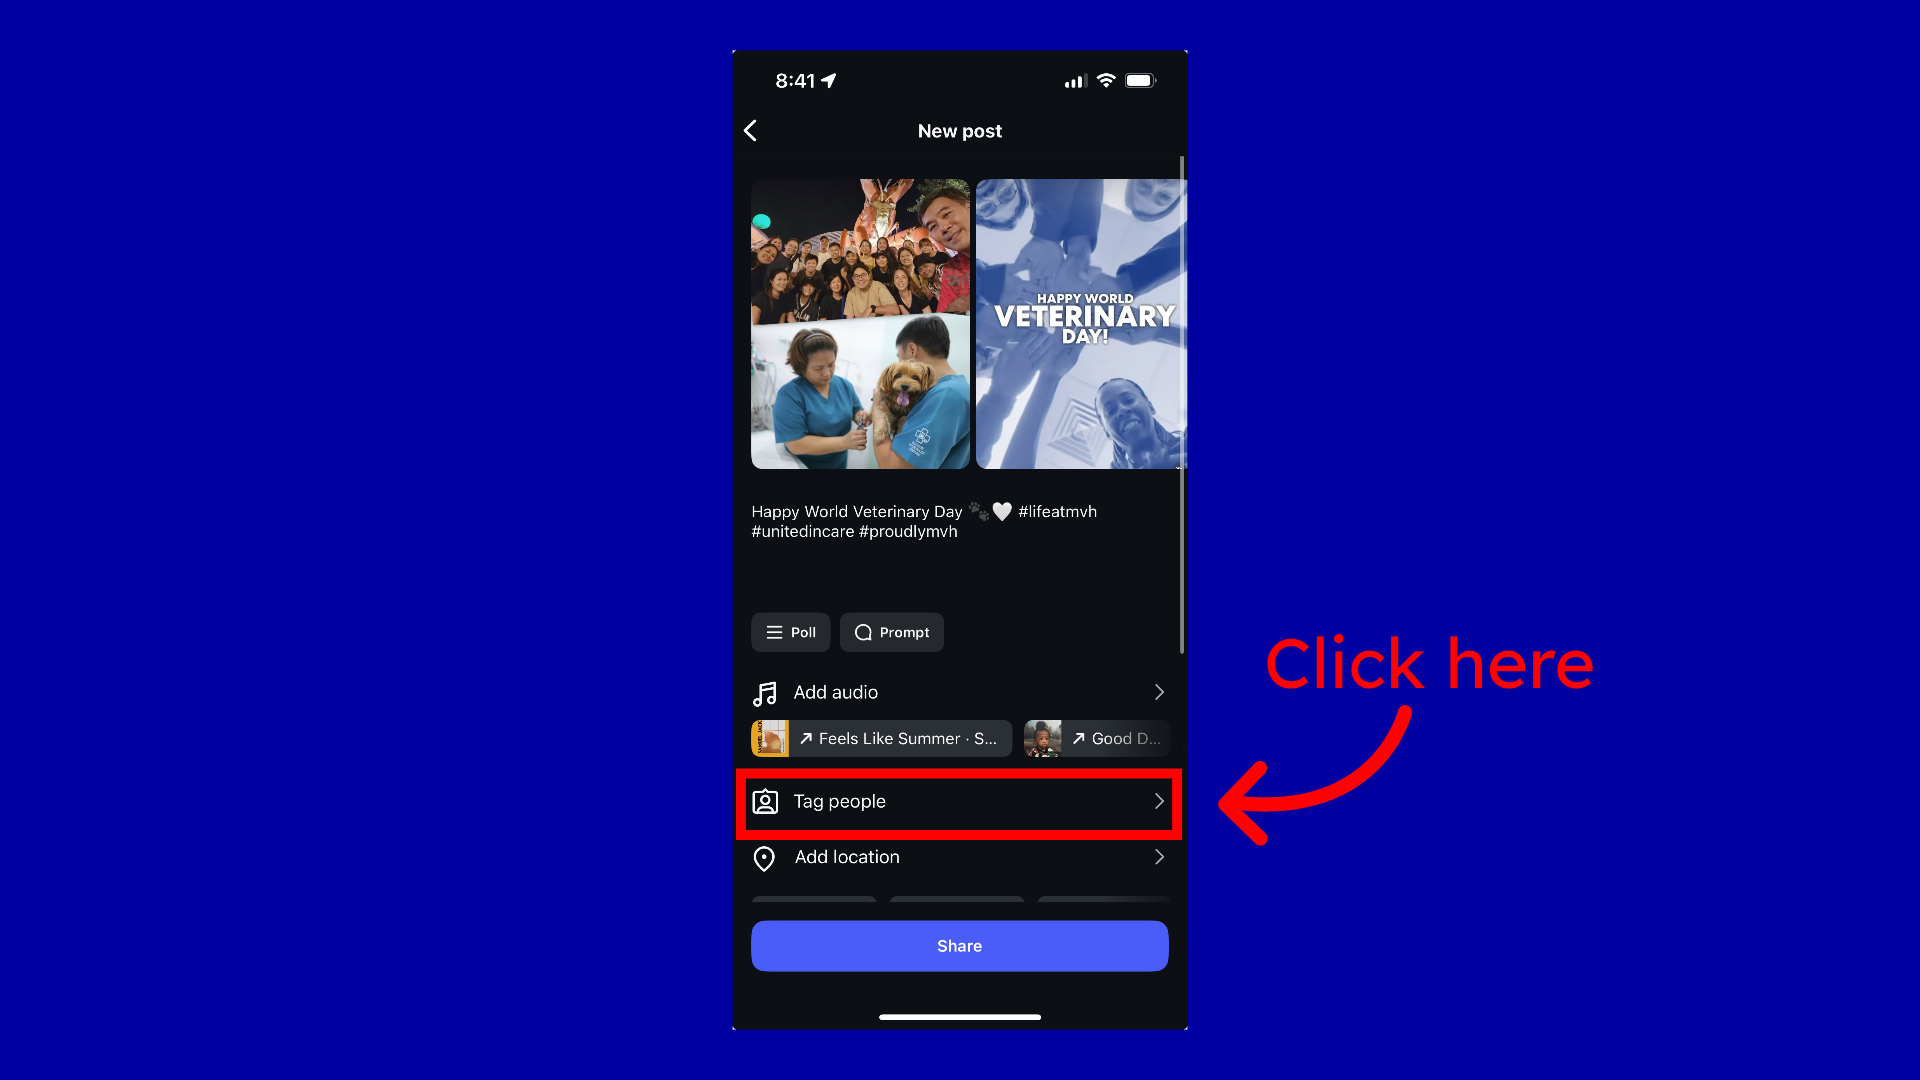
Step 11: Tag People
Another important part of posting is tagging people and accounts. There are two ways you can tag people on Instagram; this step will show you how to tag people in photos directly. Click the tag people button.
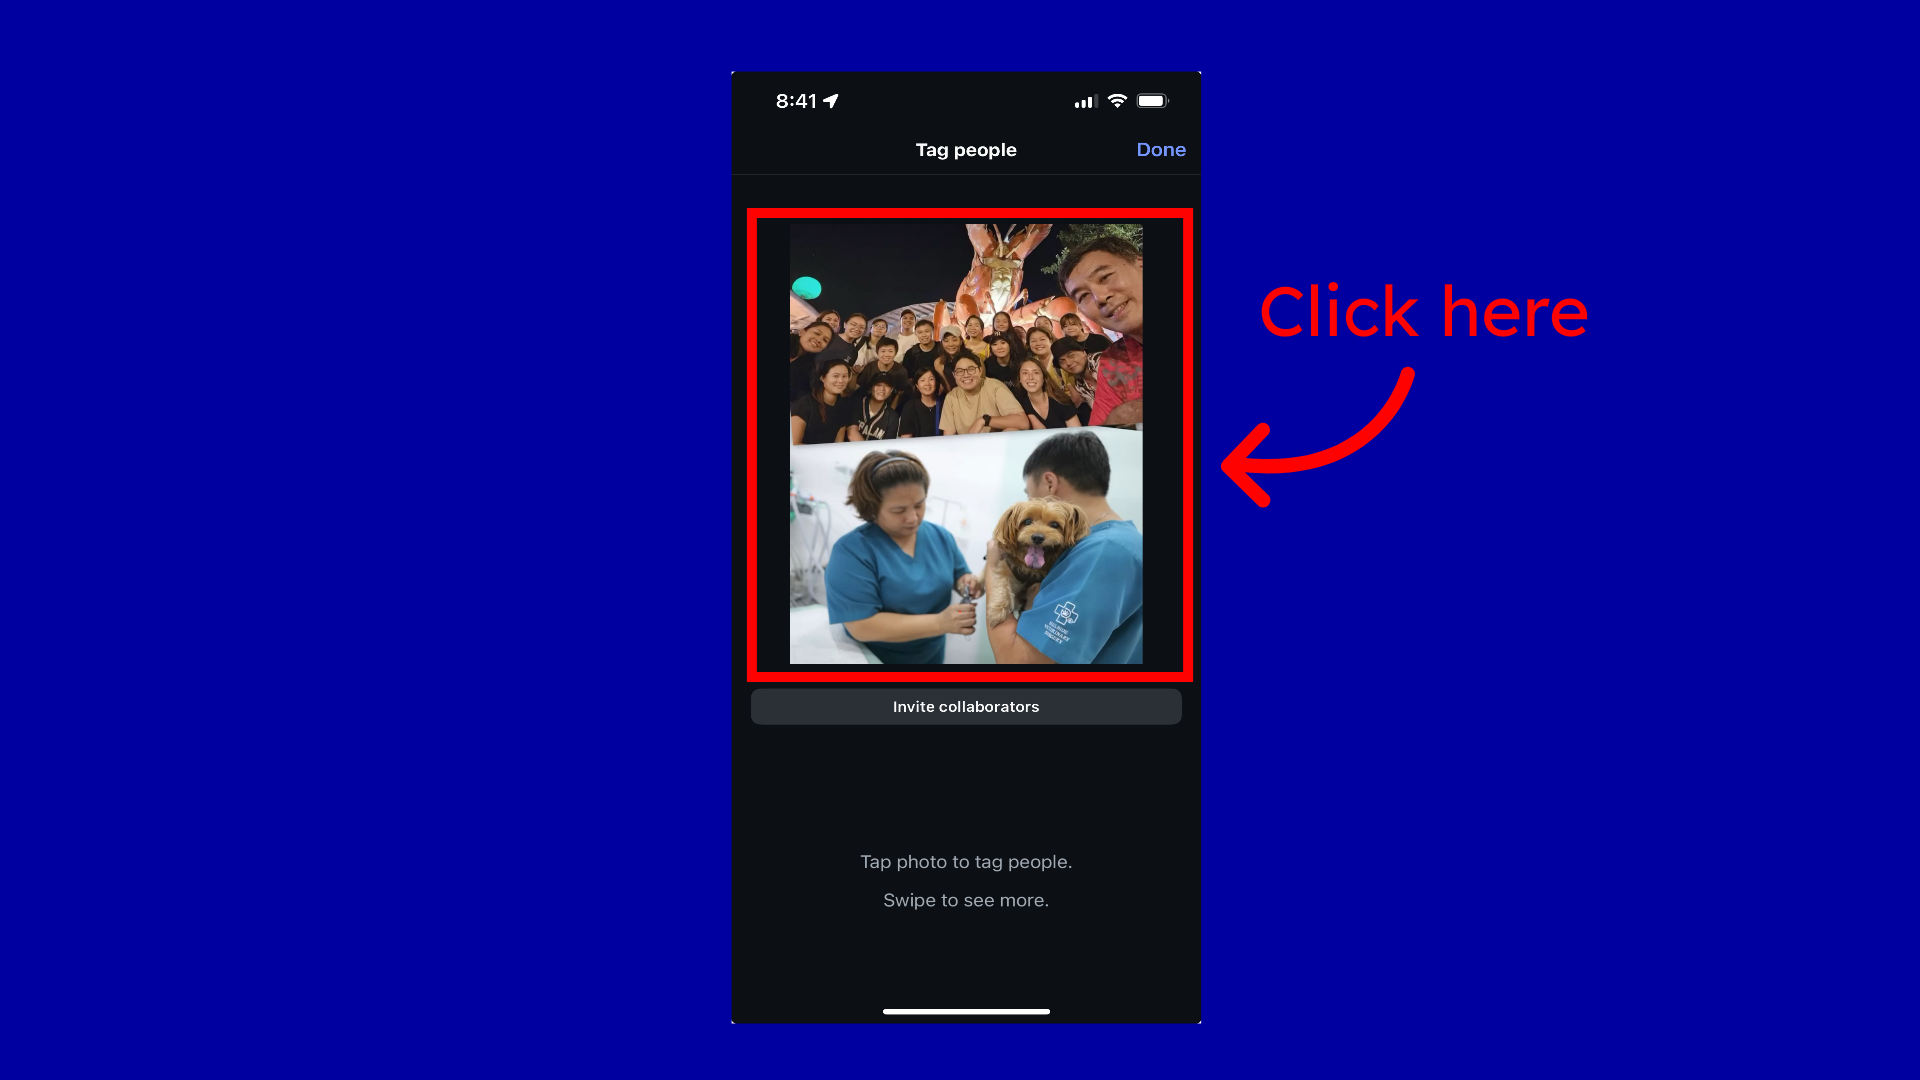
Step 12: Tag in photo
Tap the image where you want to tag the individual and or account on the photo.
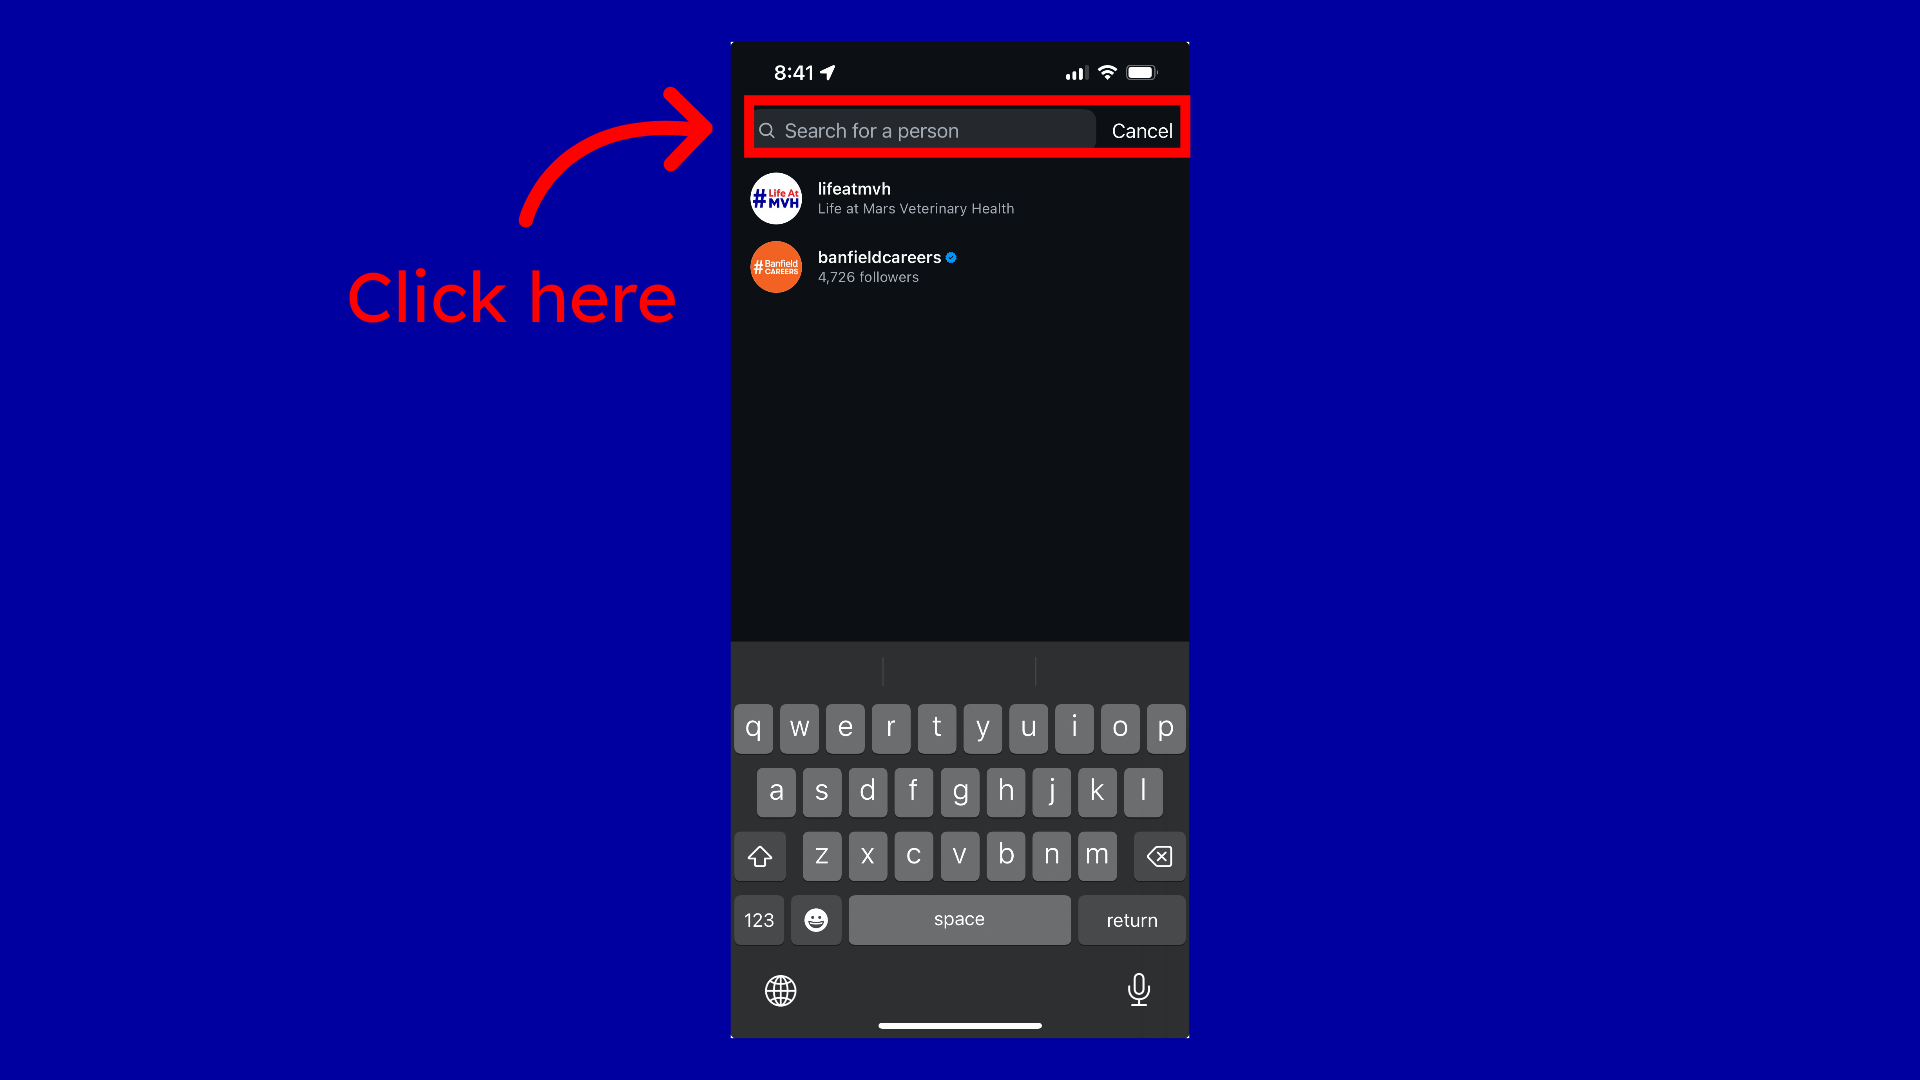
Step 13: Search the account
Search the account you want to add and select it once it appears.
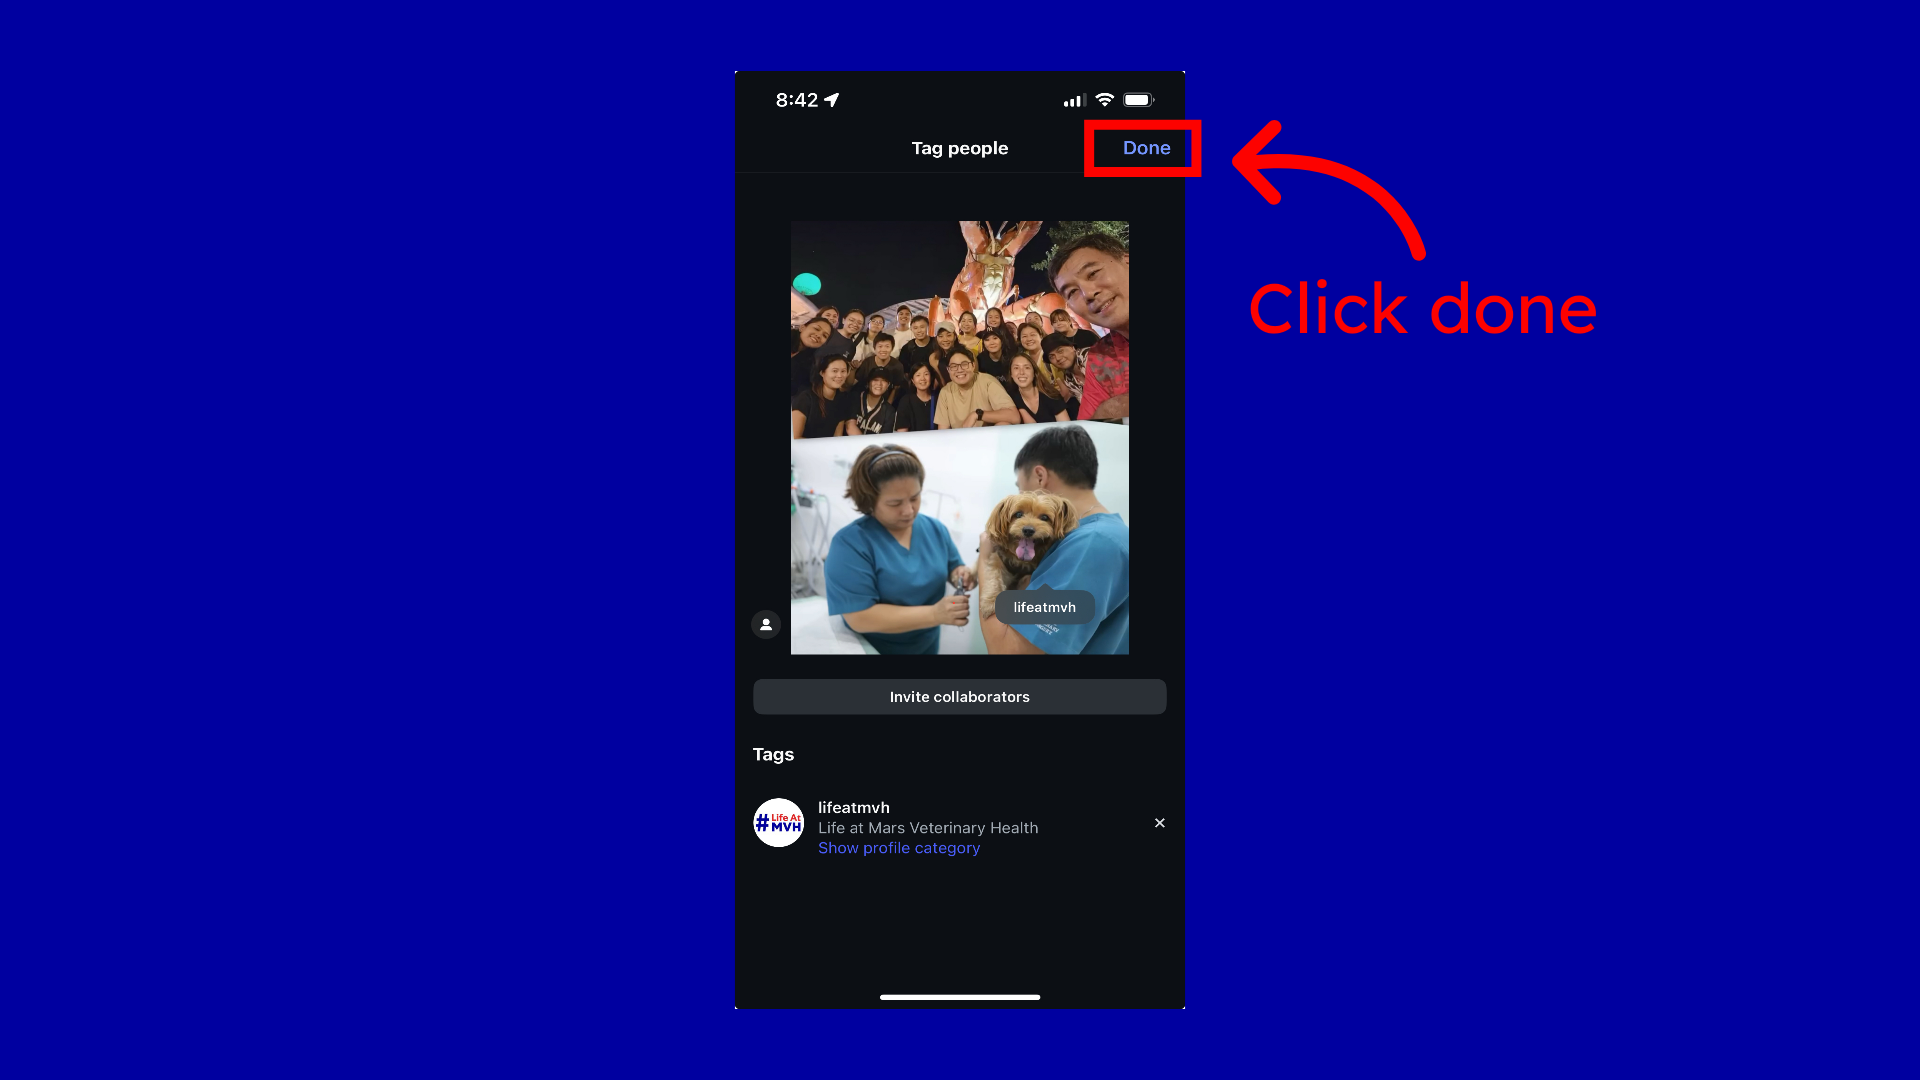
Step 14: Click “Done”
You can see we tagged lifeatmvh on the photo directly. Click done once you have tagged all the accounts you want to feature.
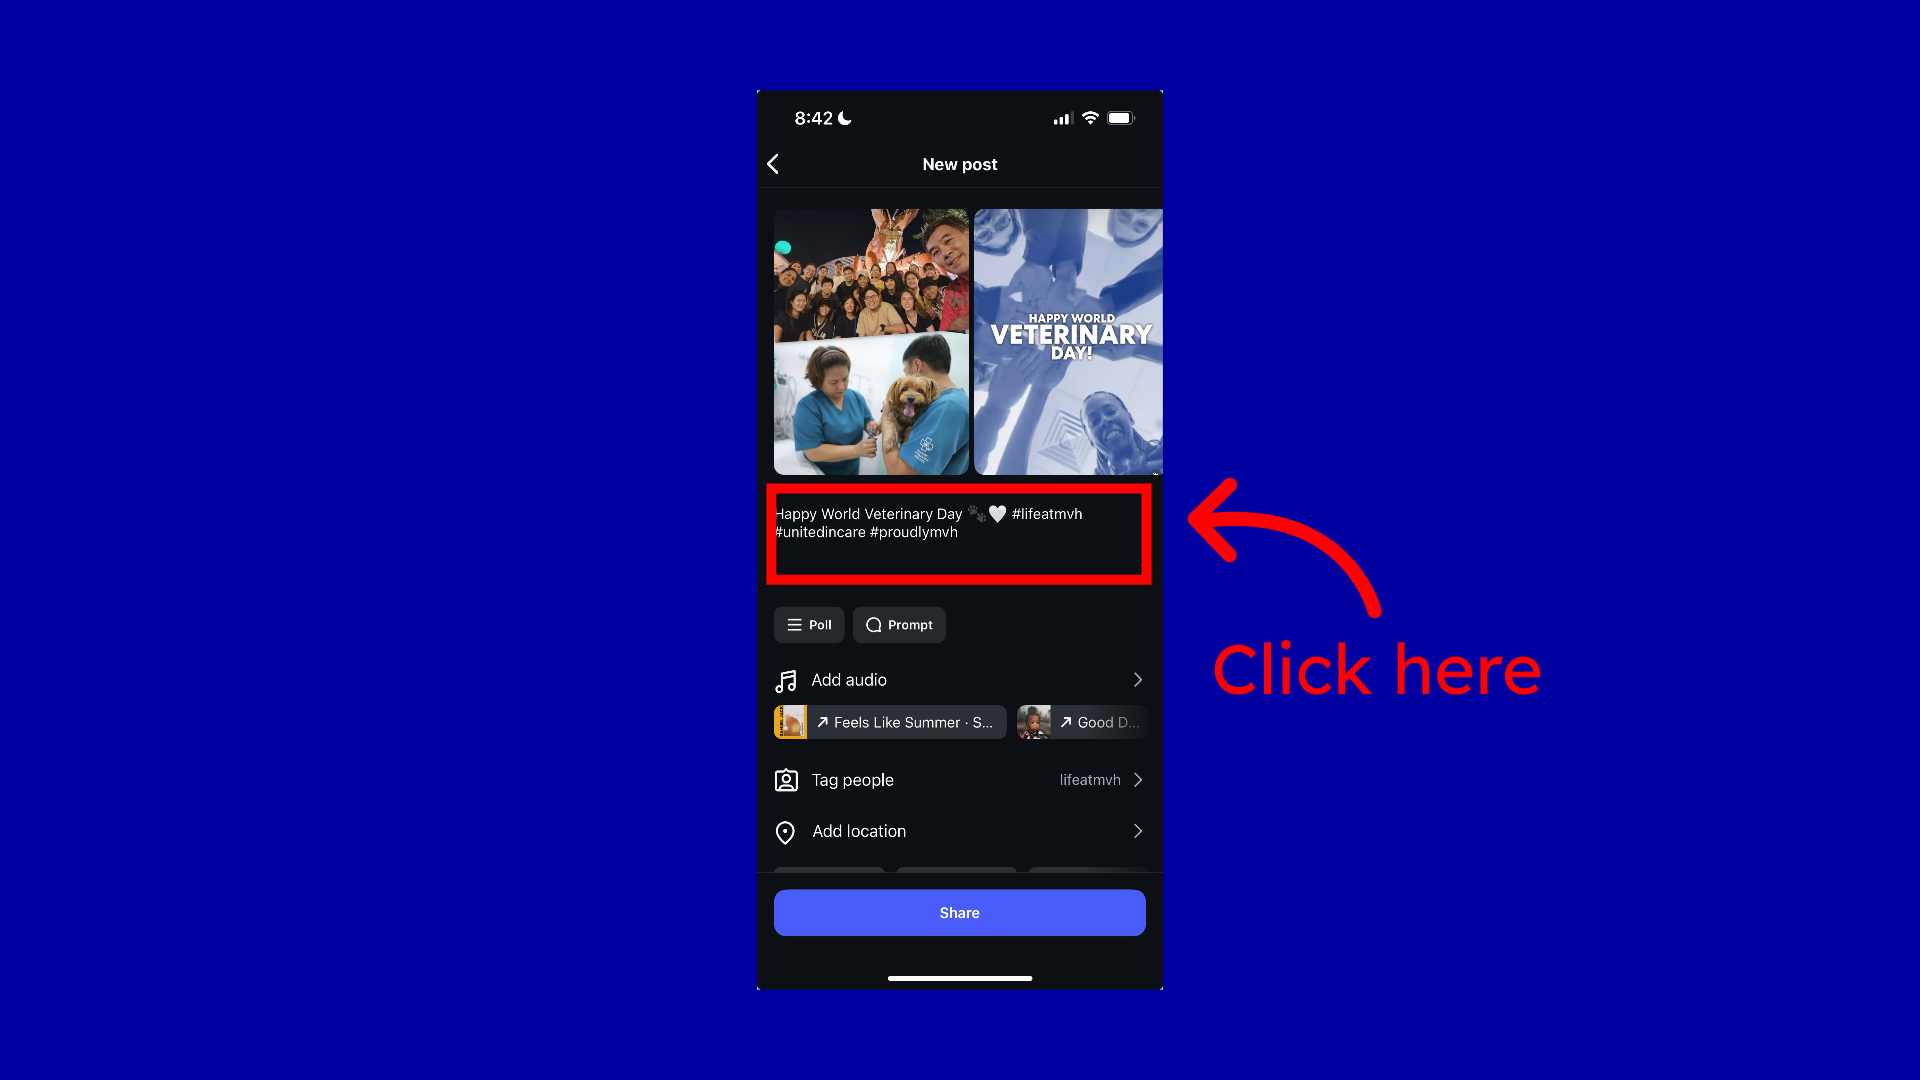
Step 15: Option to tag someone in the copy
The other option with tags is to have the account name in the copy. Click into the copy text box.
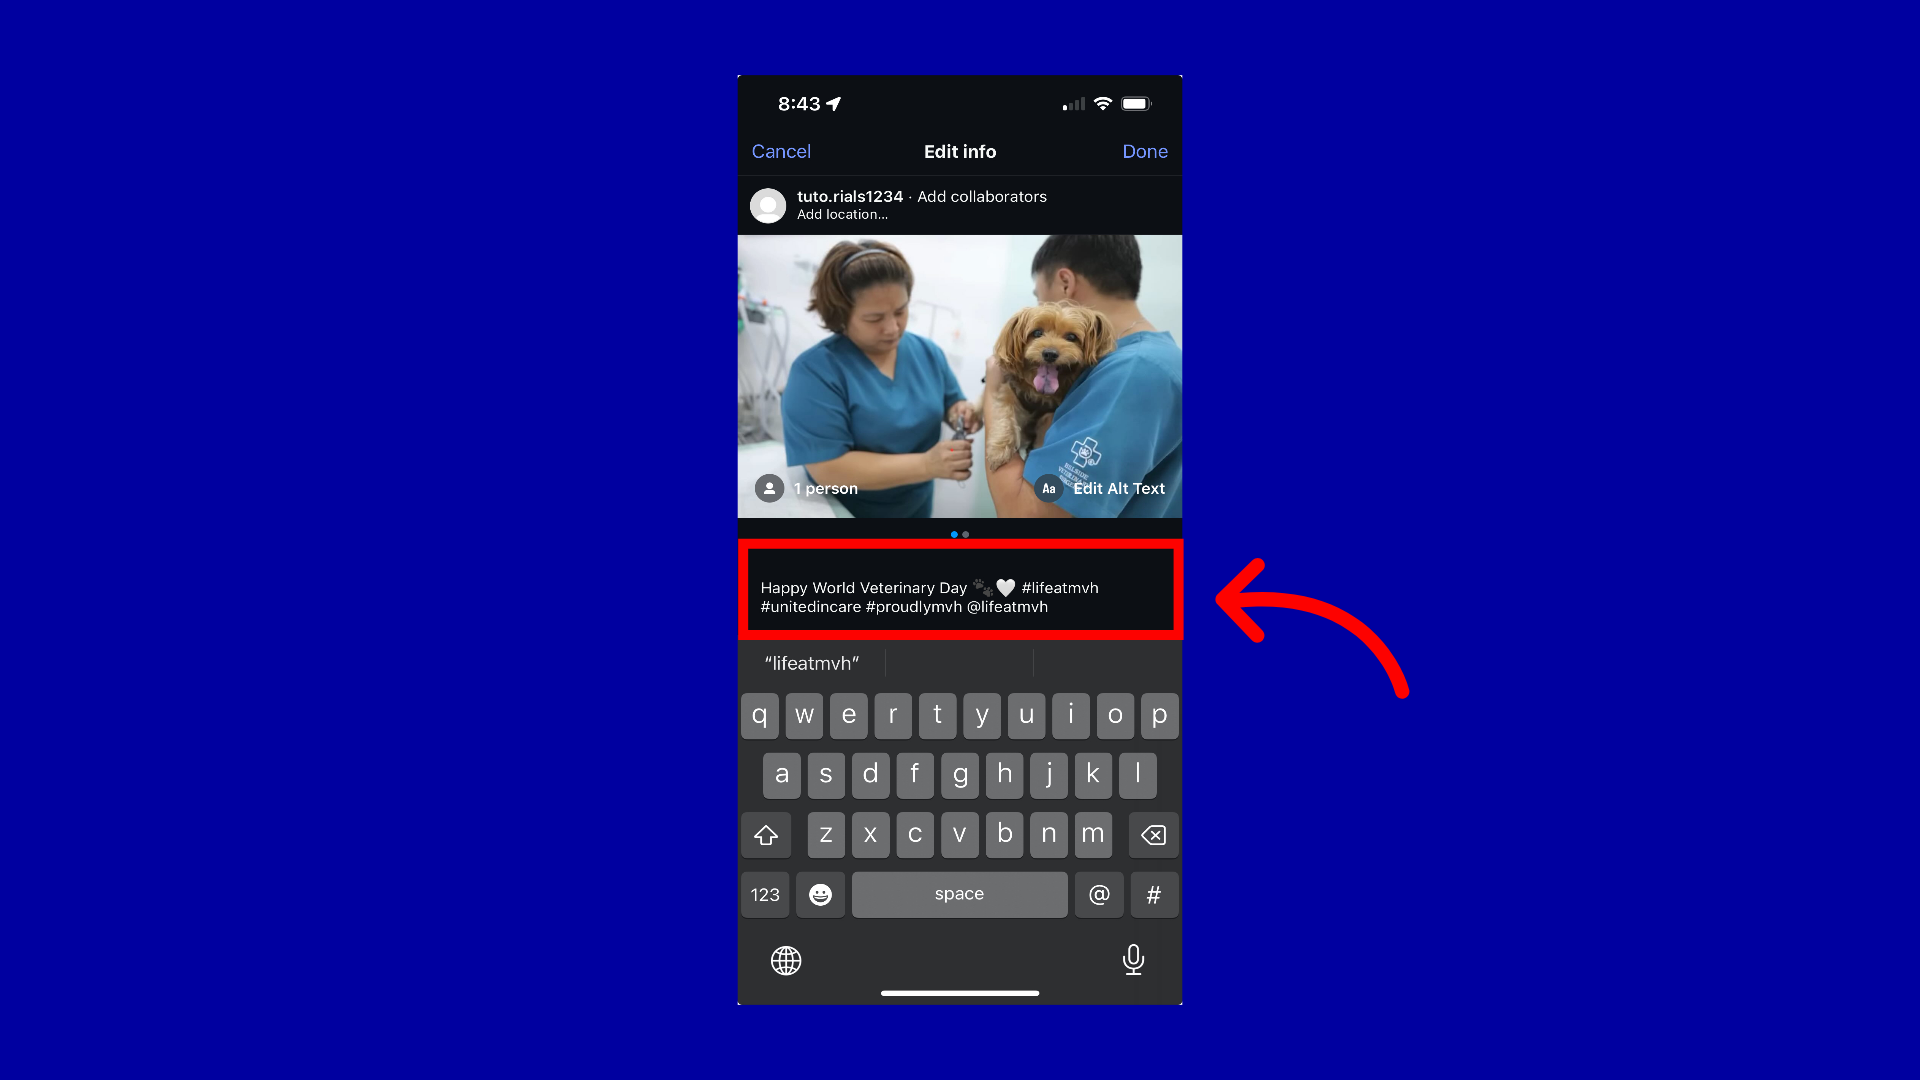
Step 16: Adding “@” to tag an account
Type the @ symbol and the account you want to tag, then you'll be able to select the account directly. Here we tagged lifeatmvh into the copy directly. Note, it does not matter which way you tag a person or account, we just ask that you utilize the tag feature to support our linkhumans scores.
Step 17: Click “Share”
Once you are done editing your post, click share. This will share the post to your feed for others to see and engage with!

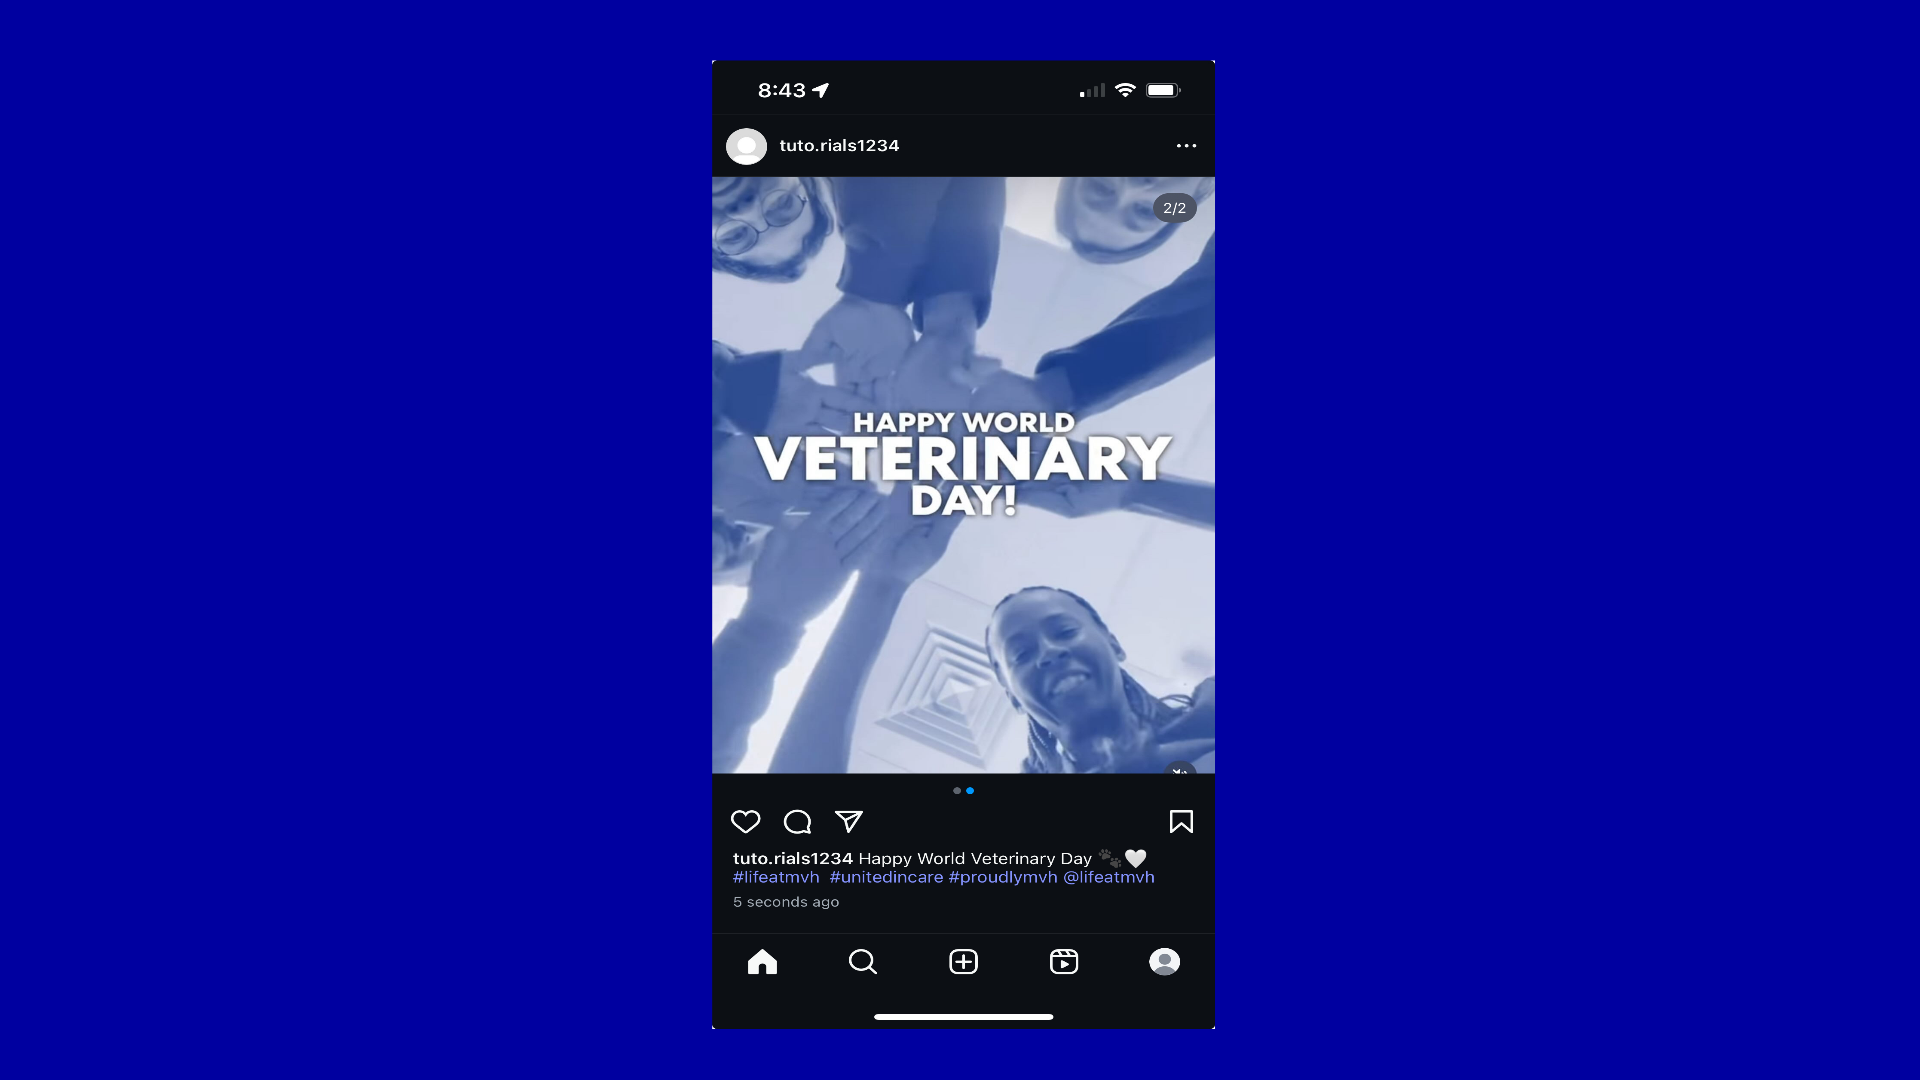
Step 18: Successfully Post on Instagram
And there you have it, you just learned how to post an image onto Instagram-nice work!
On Desktop
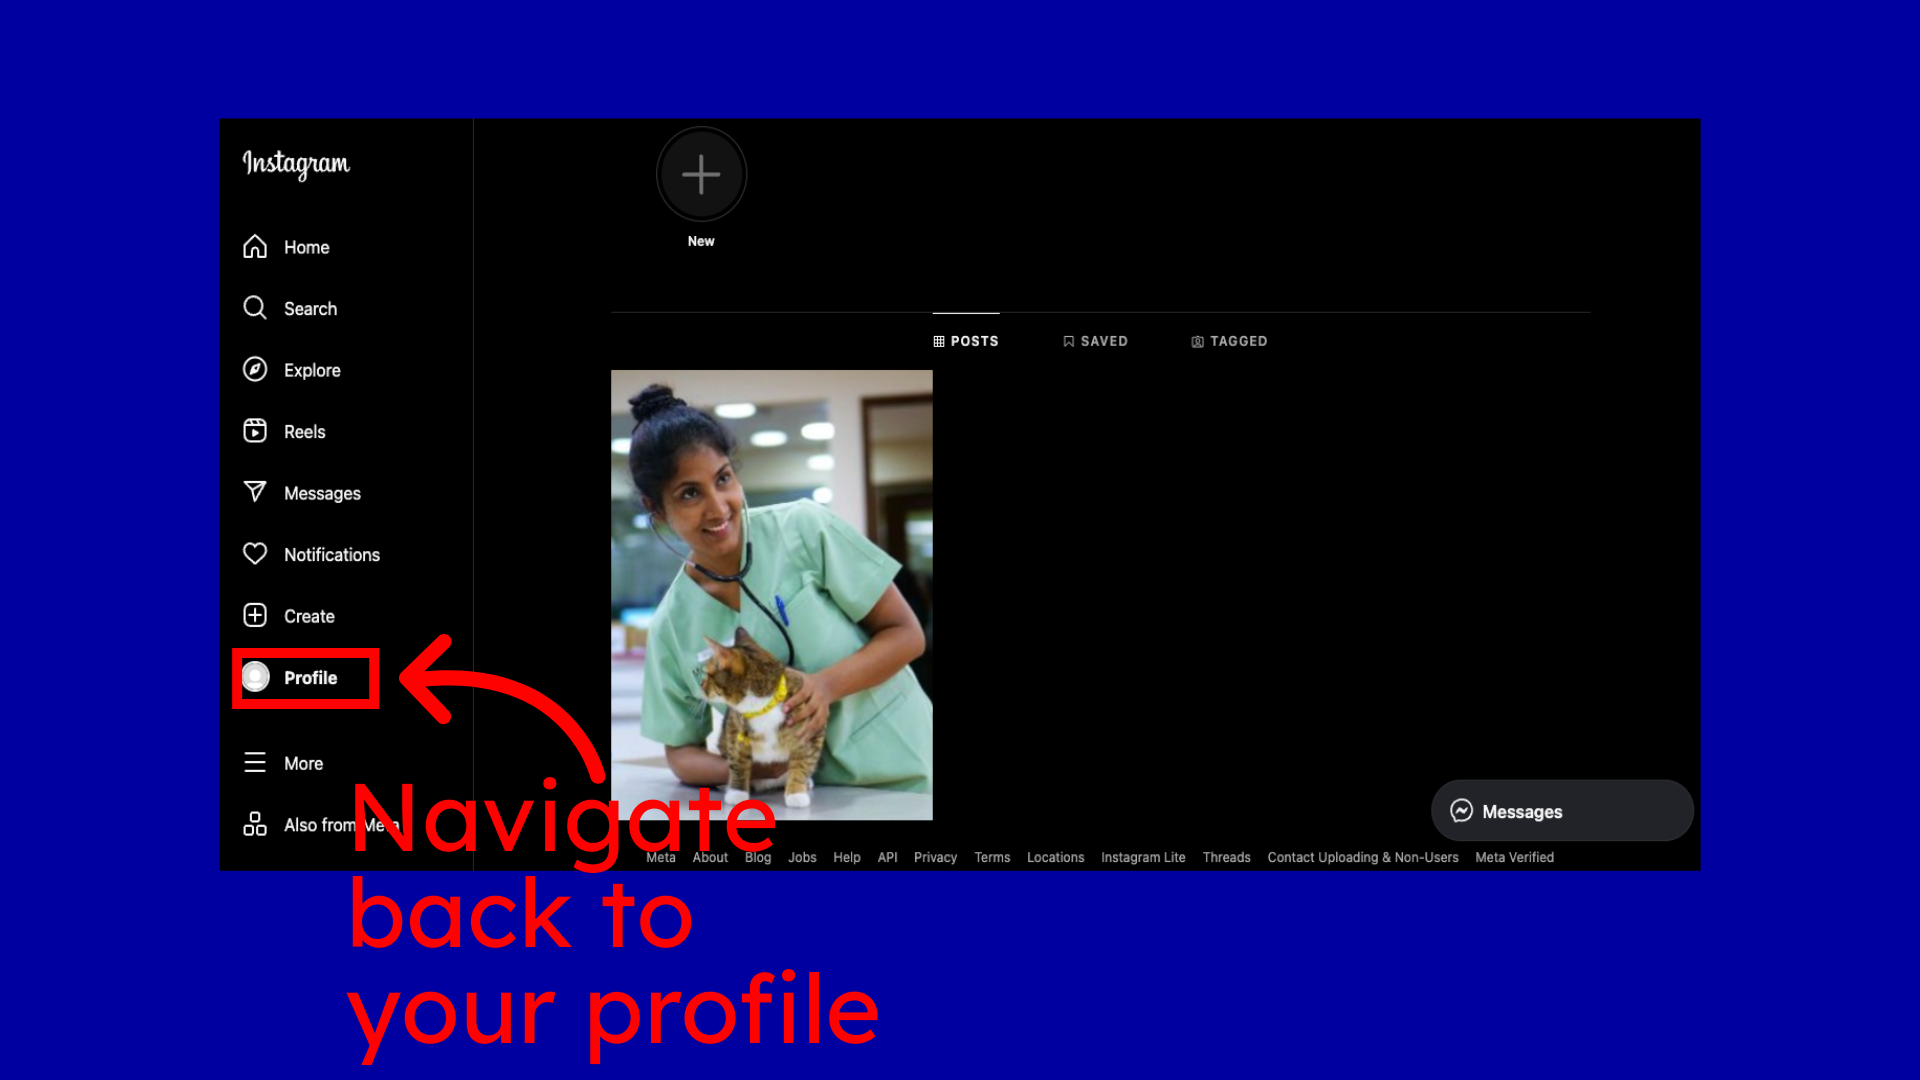
Step 1:
Navigate to your Instagram profile.

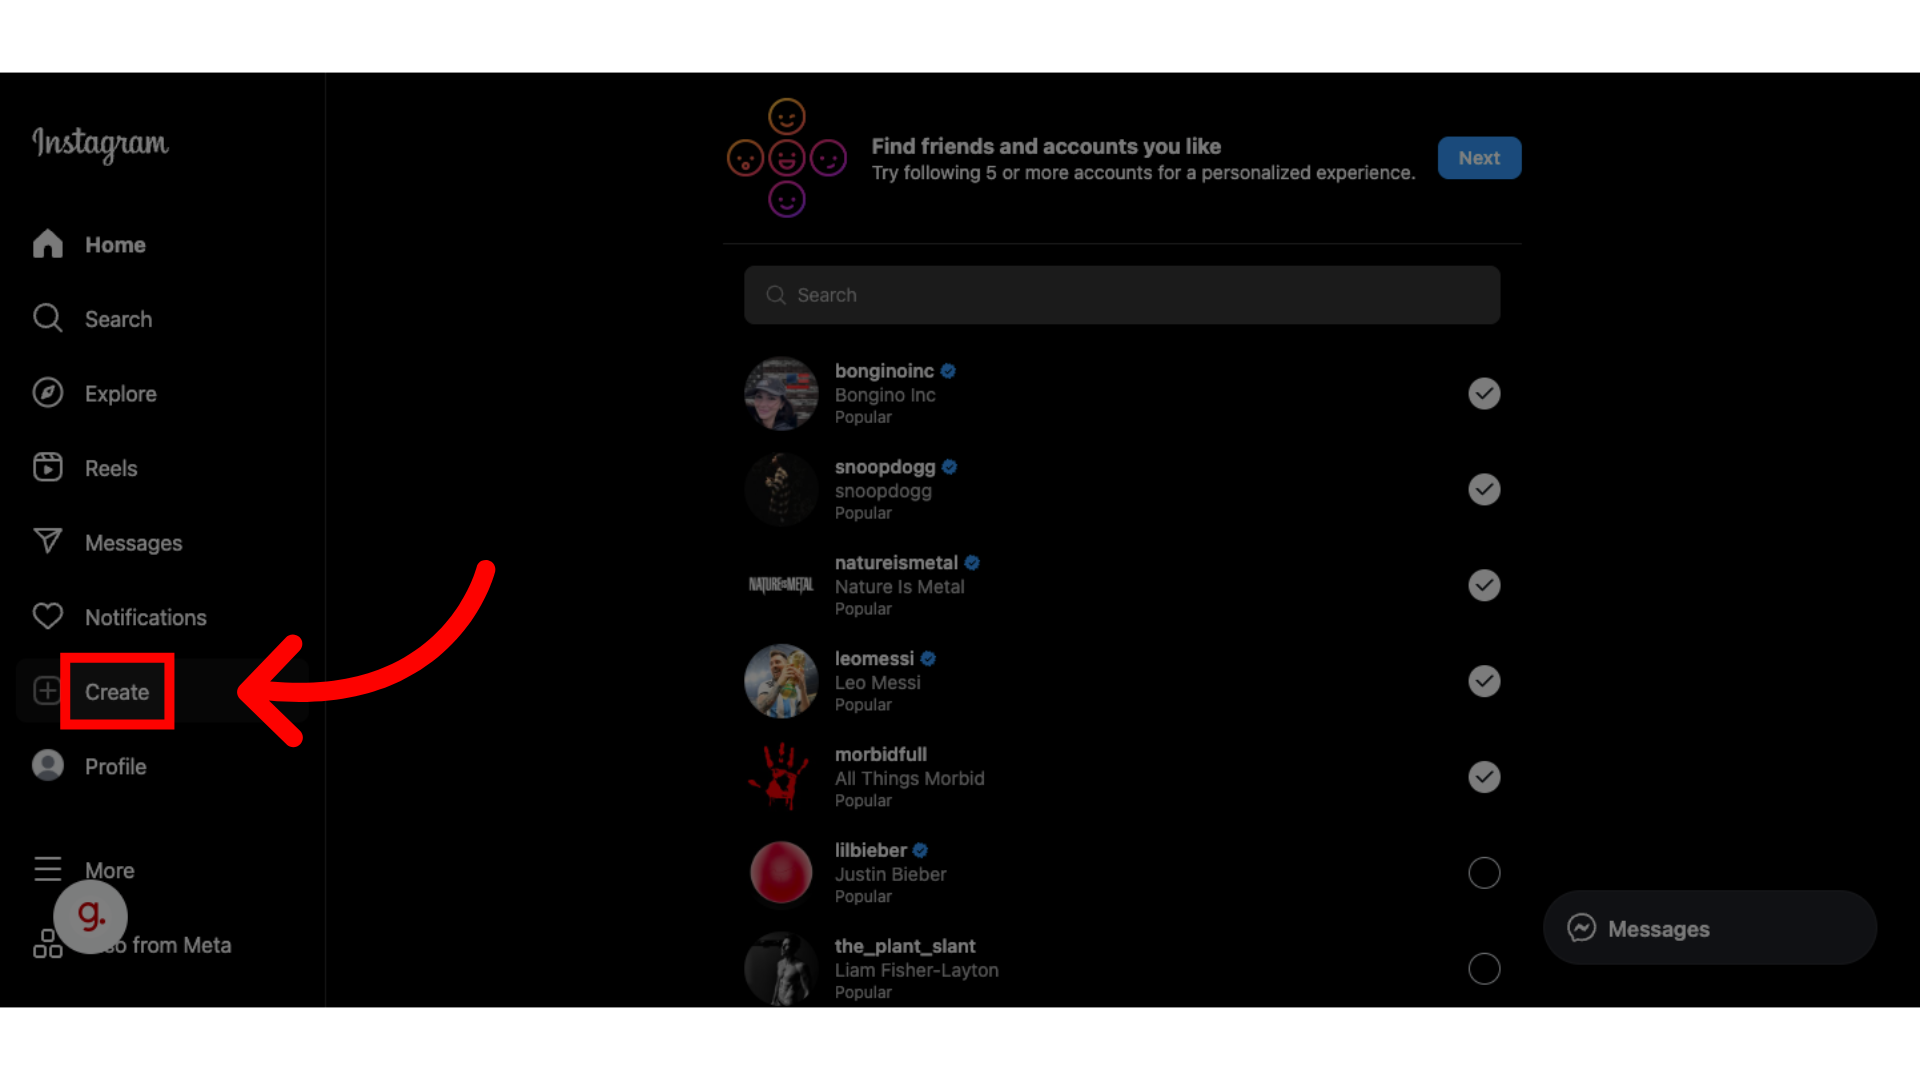
Step 2:
Start by clicking on the "Create" button to begin your post.
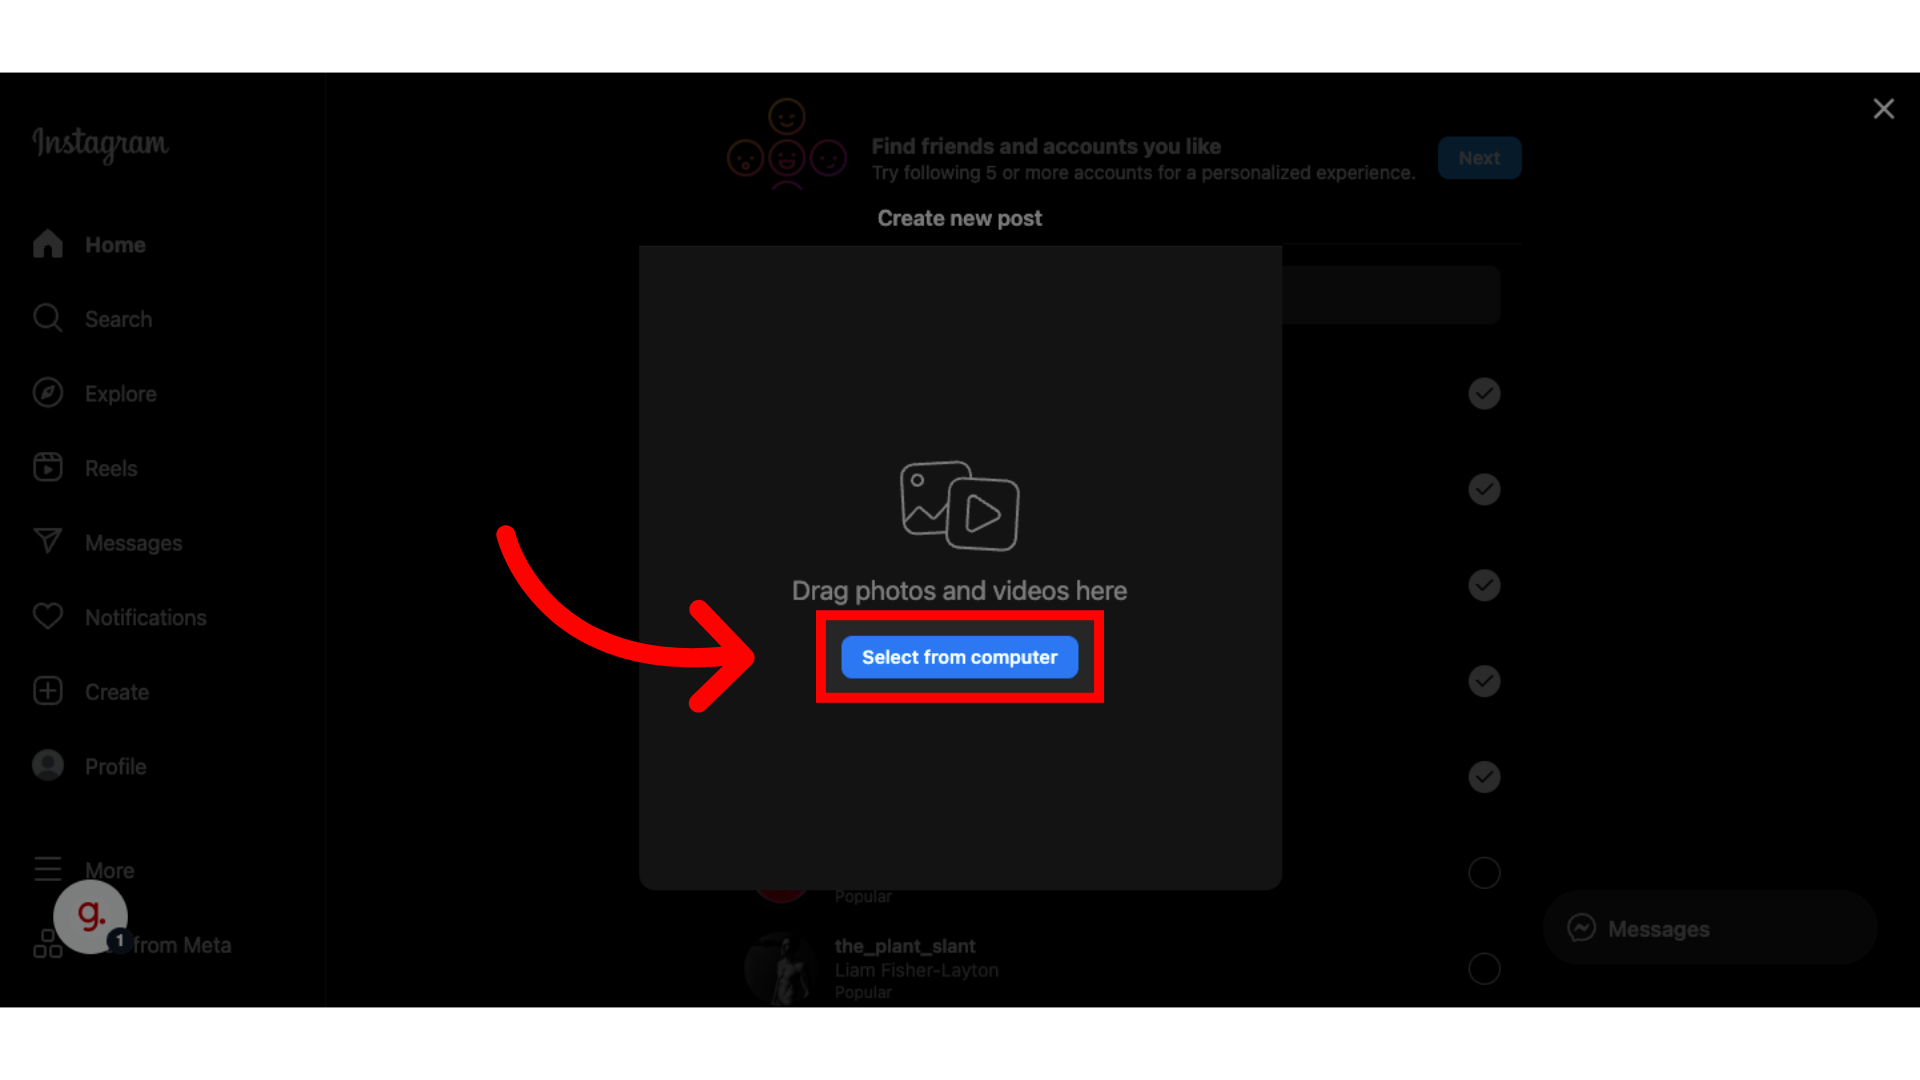
Step 3:
Choose "Select from computer" to bring you to your files window, where you can upload 1 or multiple images.
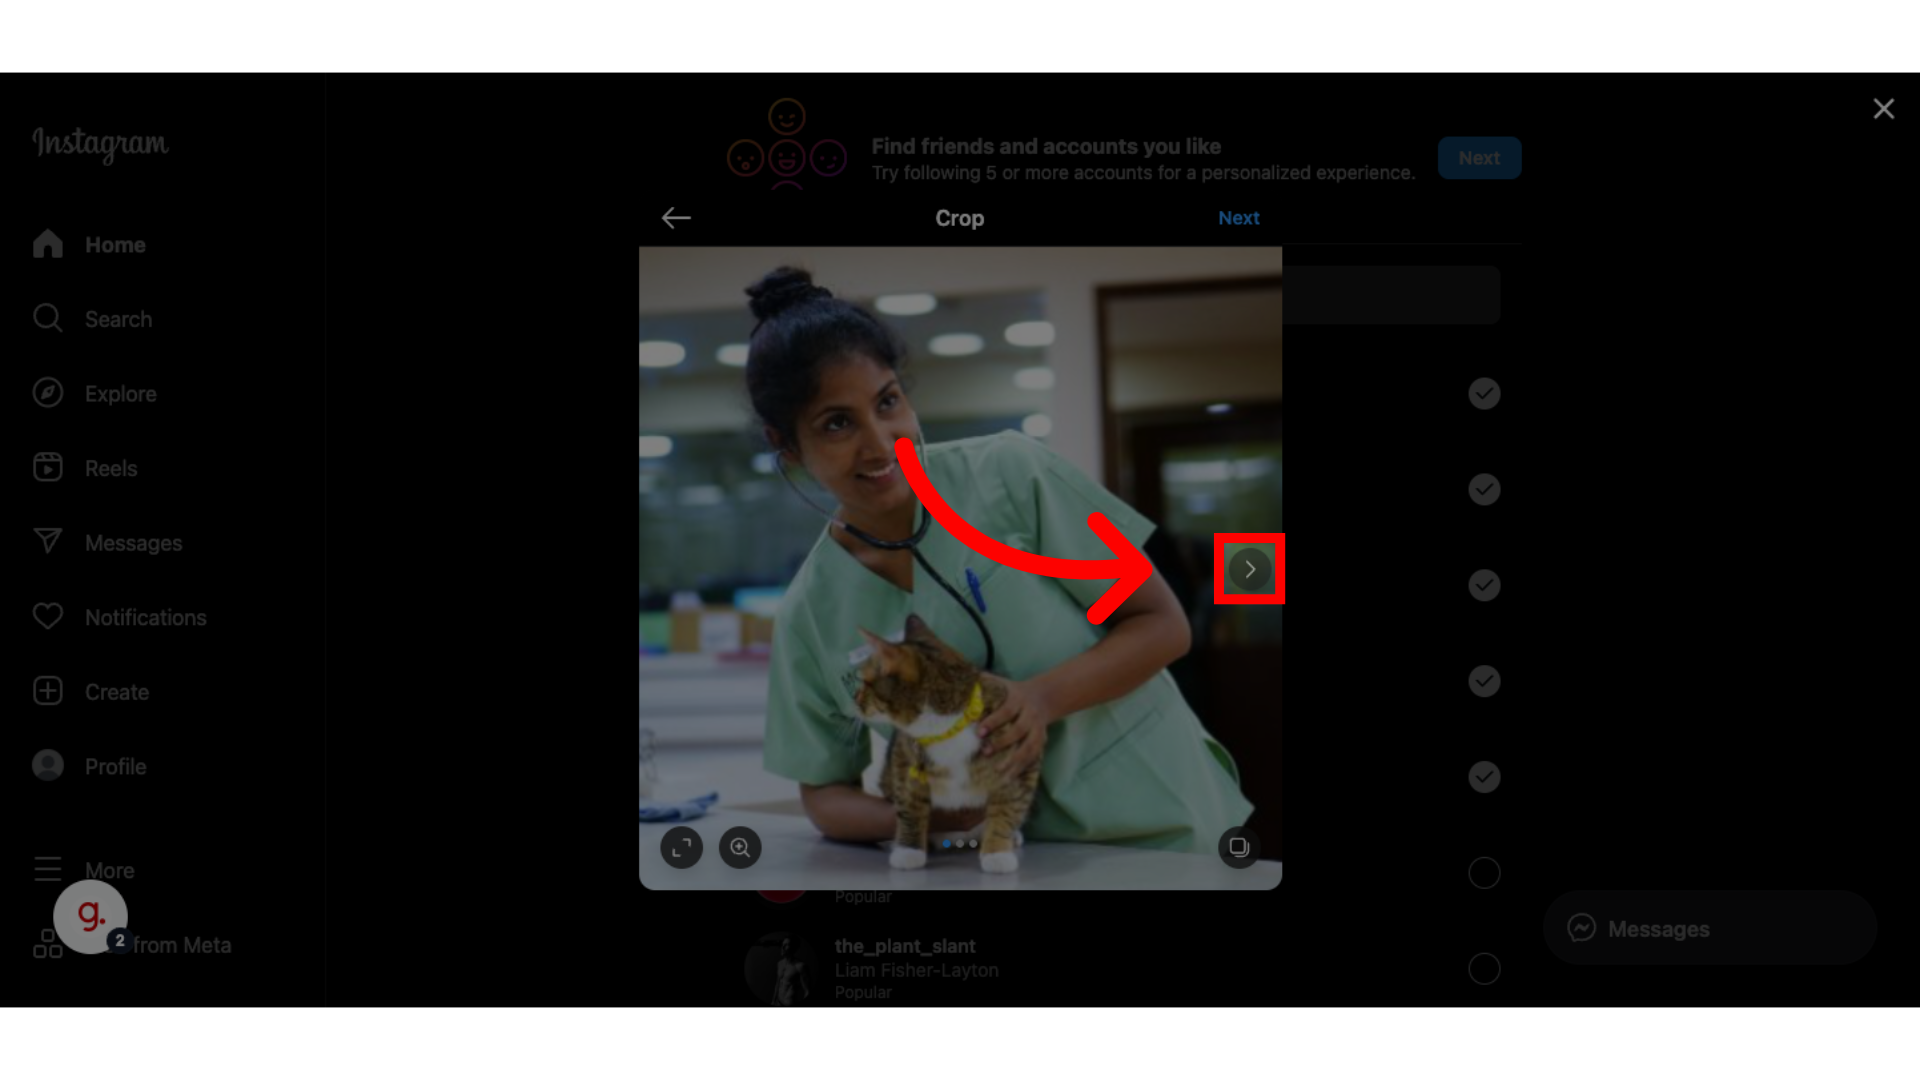
Step 4:
Once uploaded, click through all your photos to ensure they are uploaded properly. Note that this step is from multi-image posts.
Step 5:
Once you are happy with your image, click the next button.
Step 6:
Here you have the option to add filters to your image if desired.

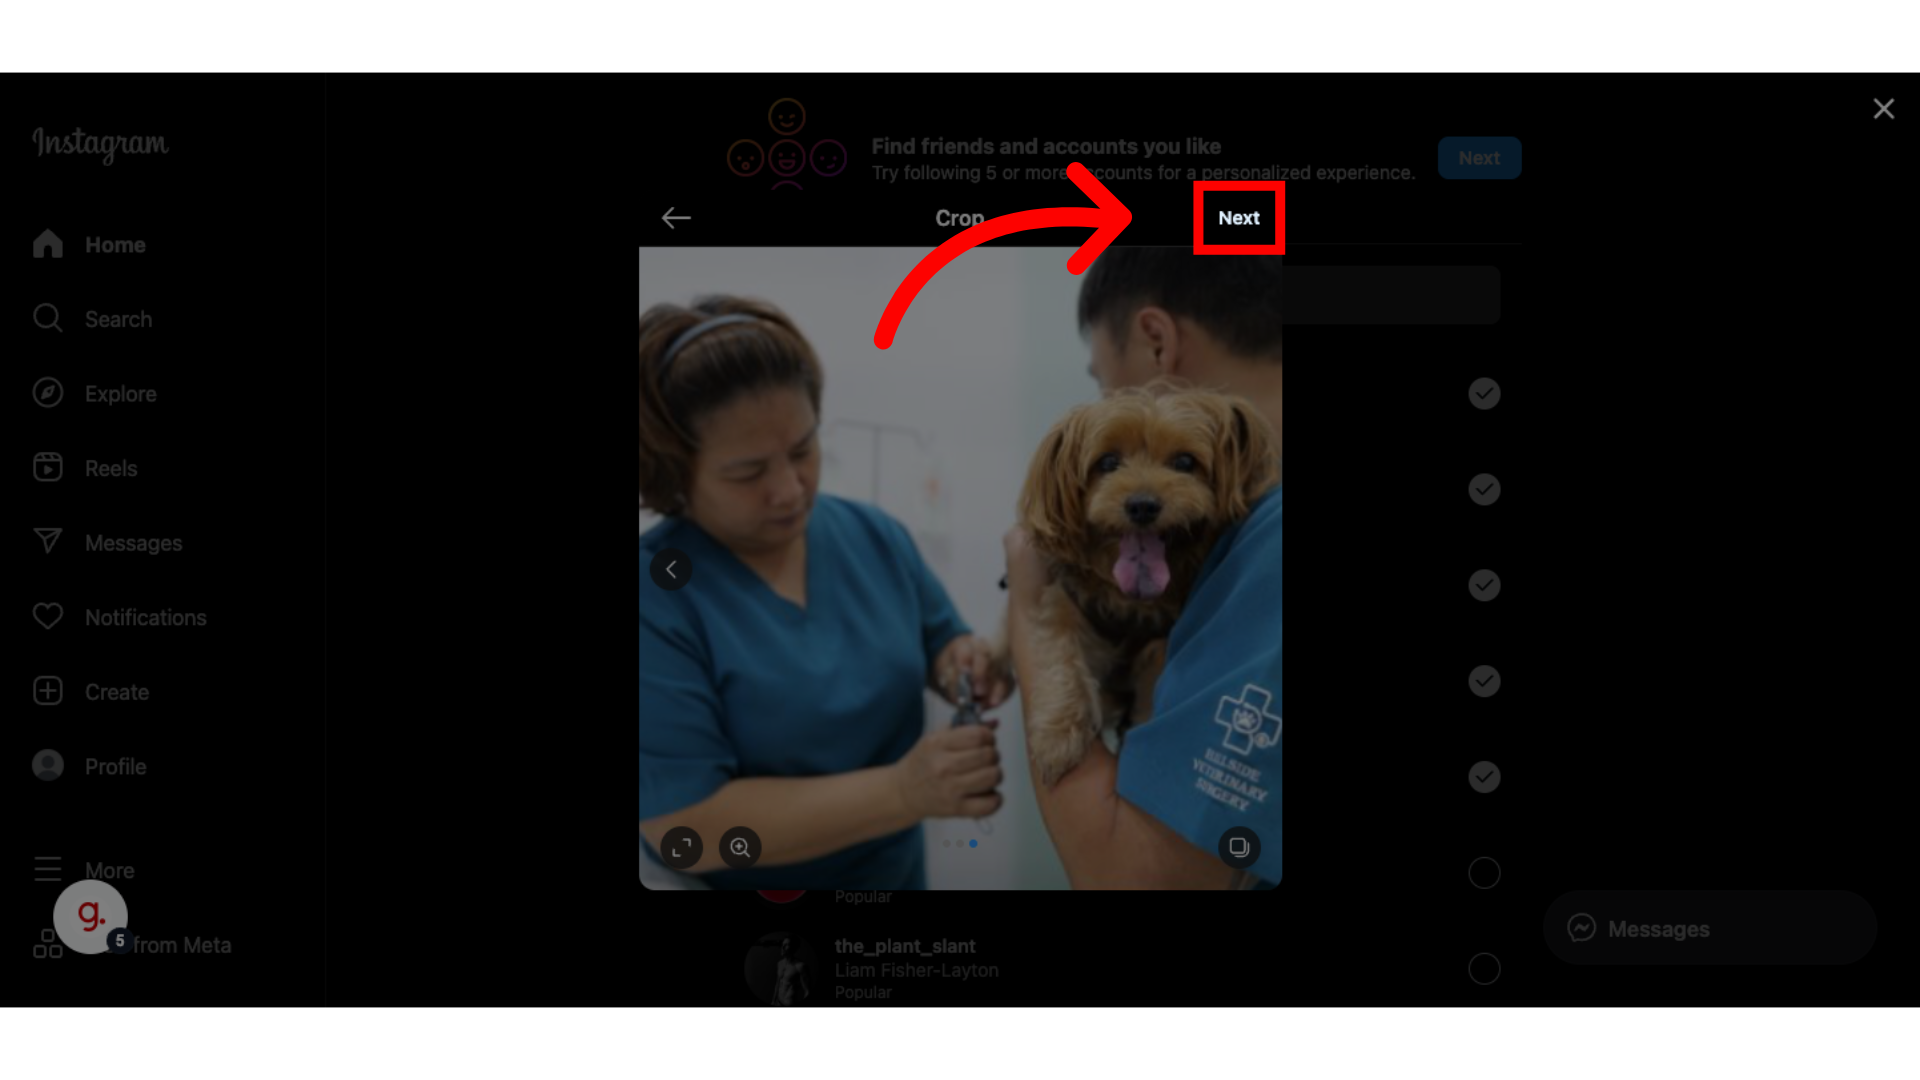
Step 7:
Click "Next" to continue with the posting process once happy with your images.

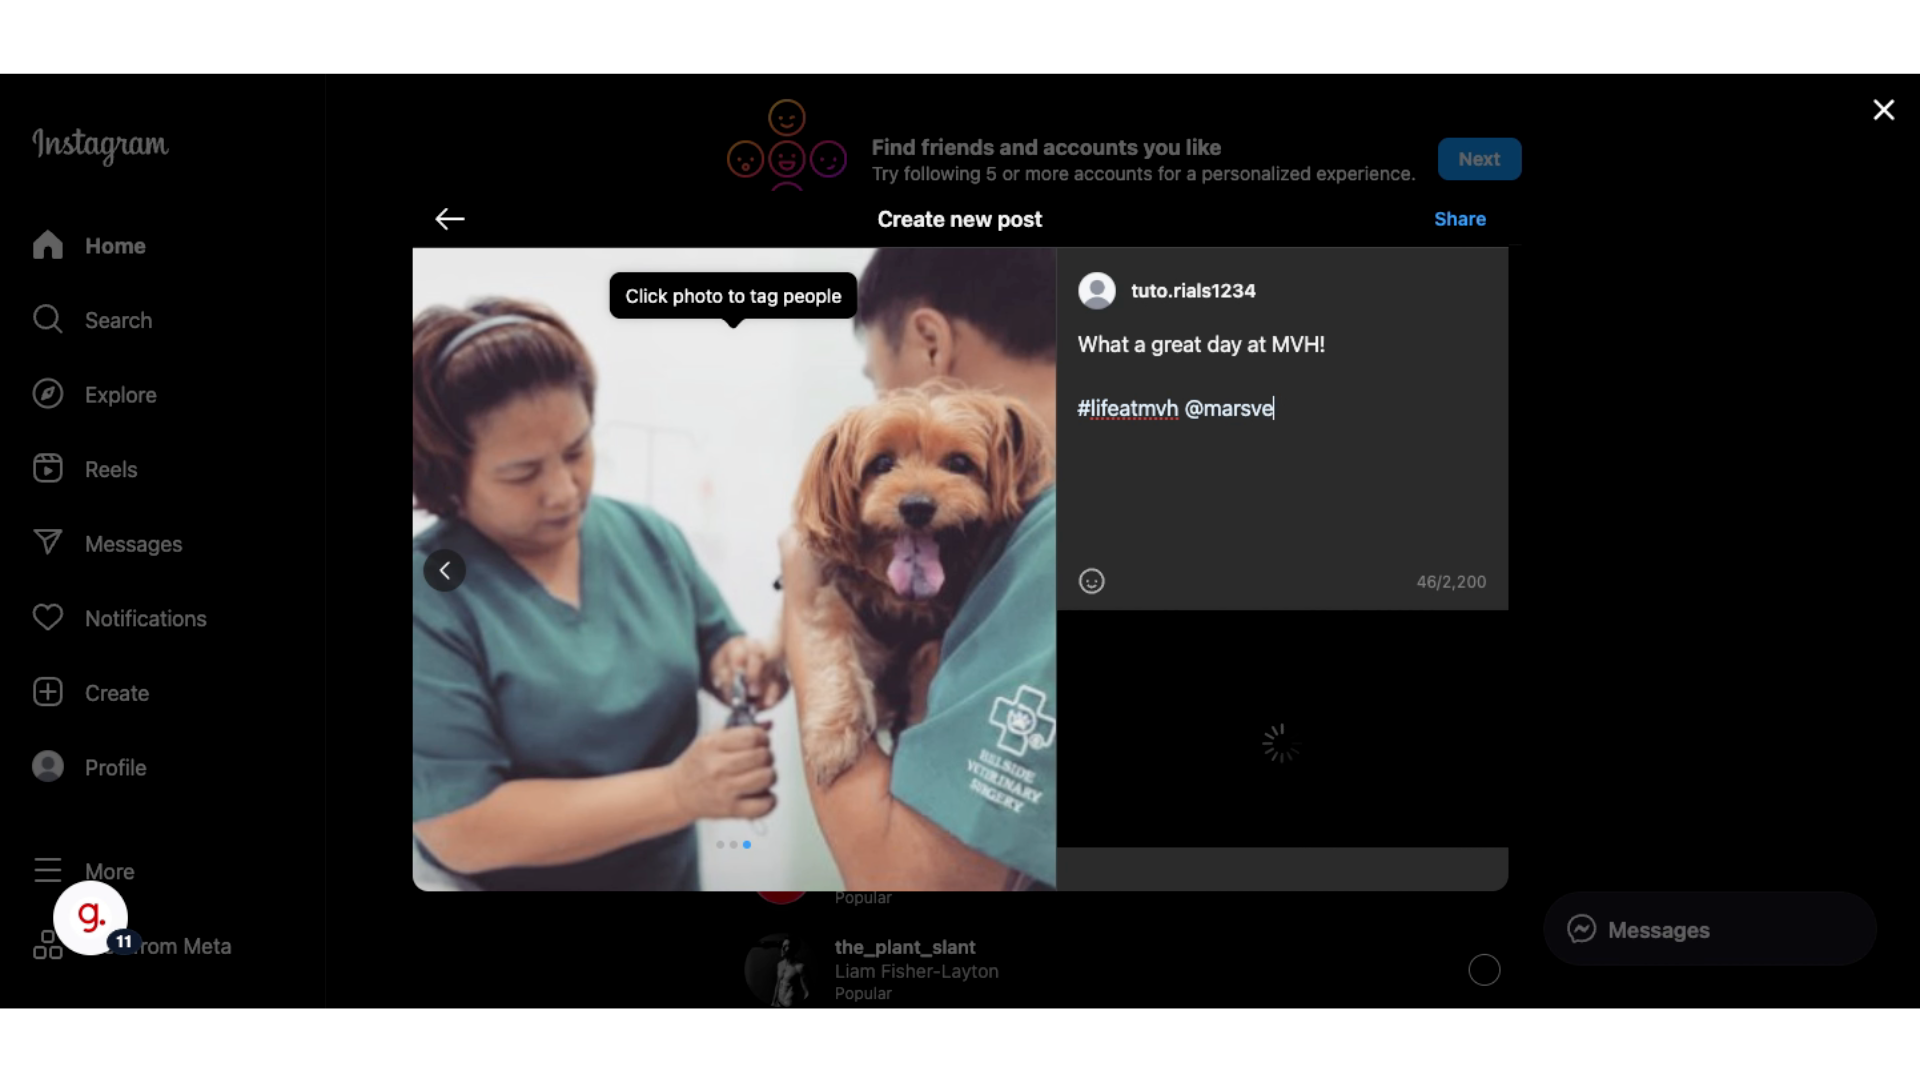
Step 8:
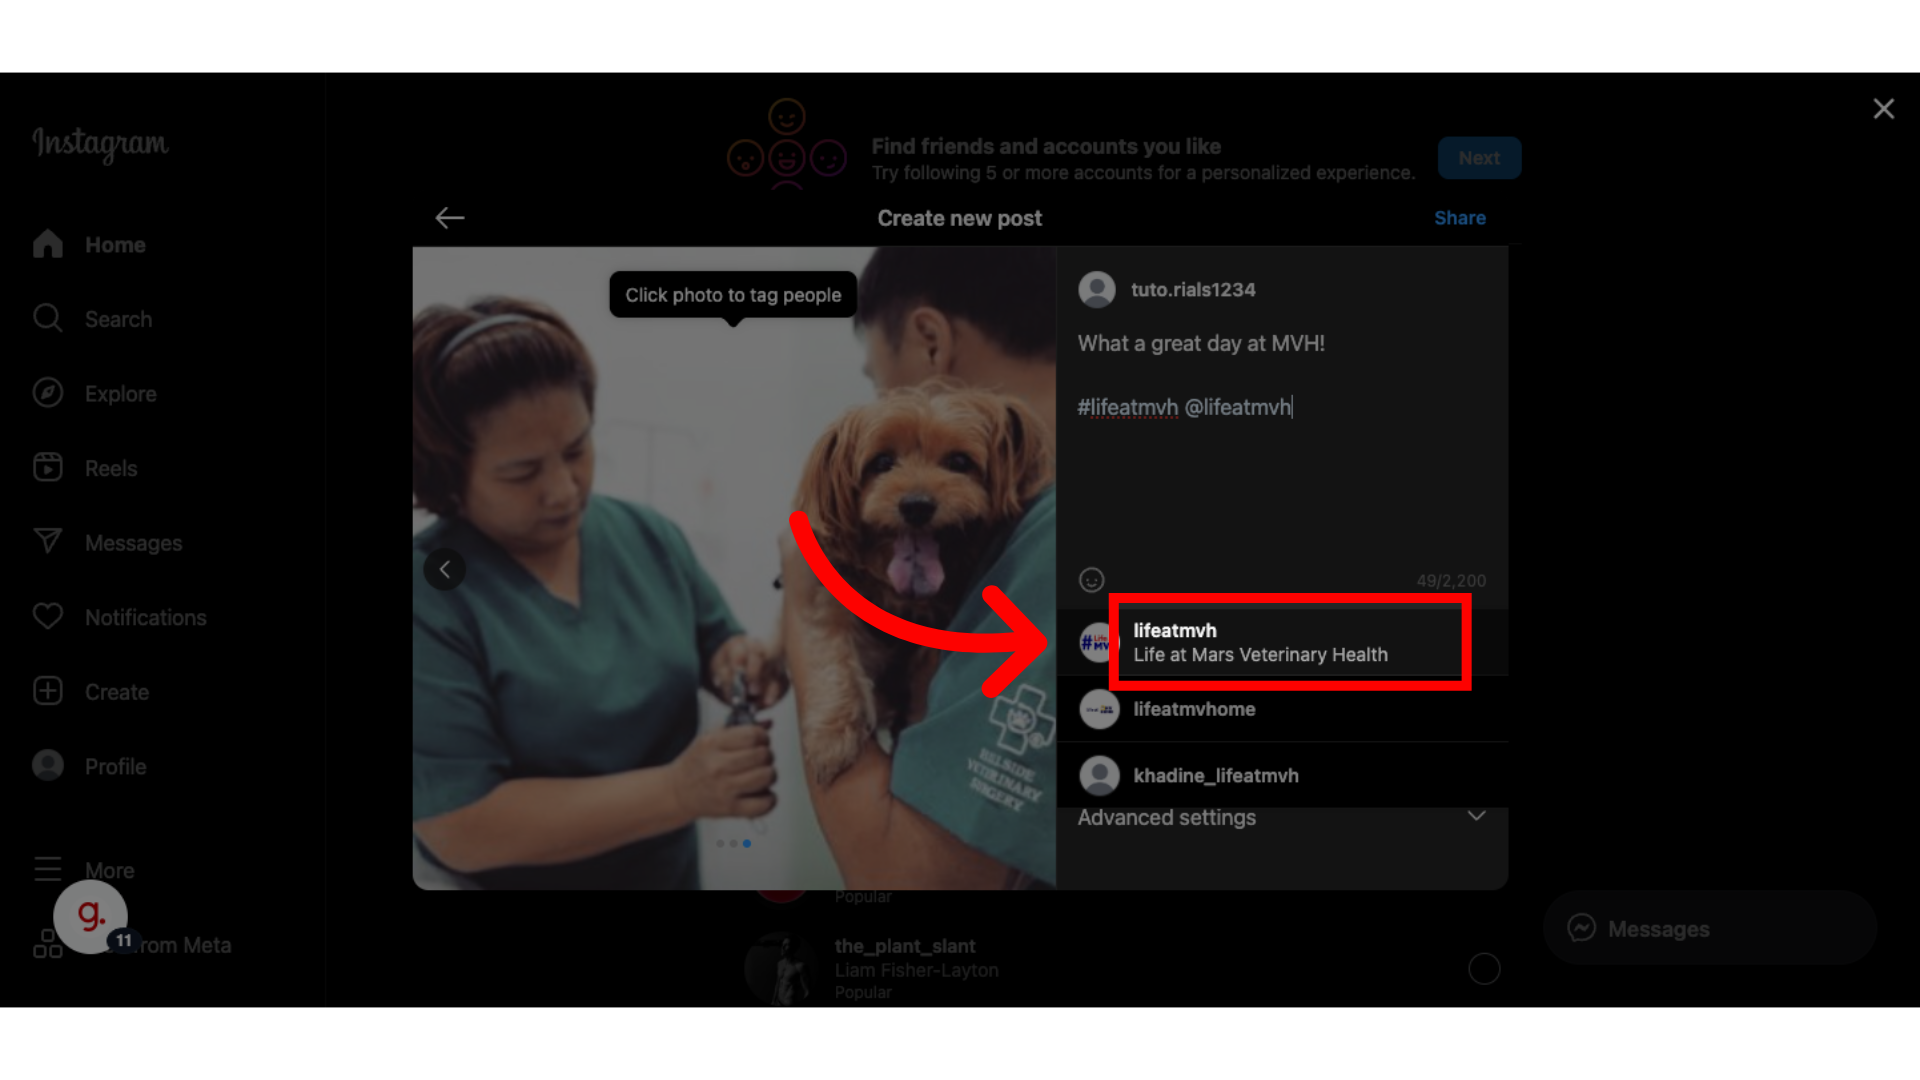
Here is where you can add your caption for the post. Don't forget to add those hashtags! To tag the lifeatmvh account start by typing the @ symbol.
Step 9:
Then the account should populate at the bottom for you to click and add to your post
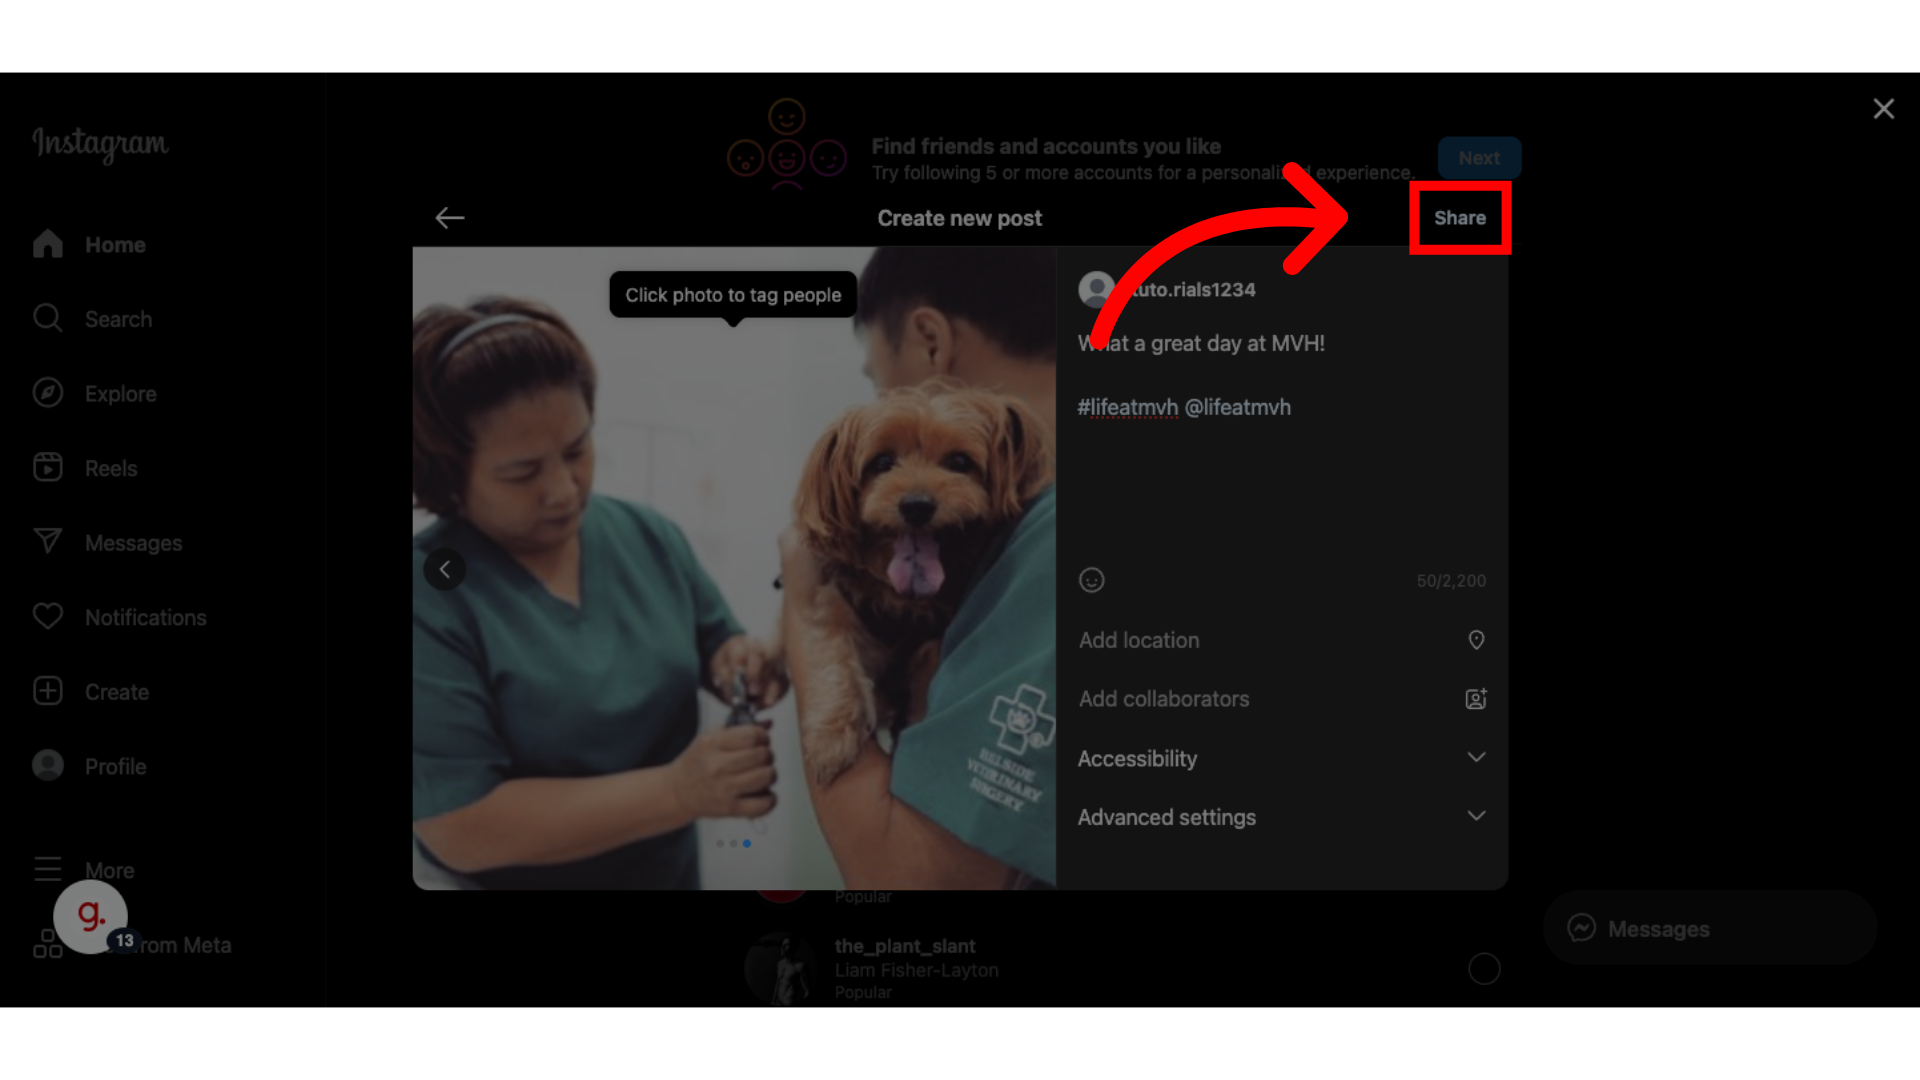
Step 10:
Finally, click on "Share" to publish your post to your feed.
Step 11:
Go back to your profile, and there you have it-a post to your Instagram feed.